

How To Remove Wood Shelving From Closet
How to Brand Elementary and Cheap DIY Closet Shelves
I take been and then excited to install wood closet shelves DIY manner! Nosotros could have opted for closet shelves from Lowes or Home Depot, but closet shelving nosotros decided to practise DIY closet shelves to kick off week 3 of my 30 Twenty-four hour period Declutter claiming. When information technology came to tackling our bathrooms and linen closets I was slightly uninspired, because we Detest all the closets in our house. And then instead of simply organizing and decluttering we decided to do some DIY wood closet shelves.
This DIY wood closet shelves mail service contains affiliate links
Cupboard Organization – Woods Closet Shelves
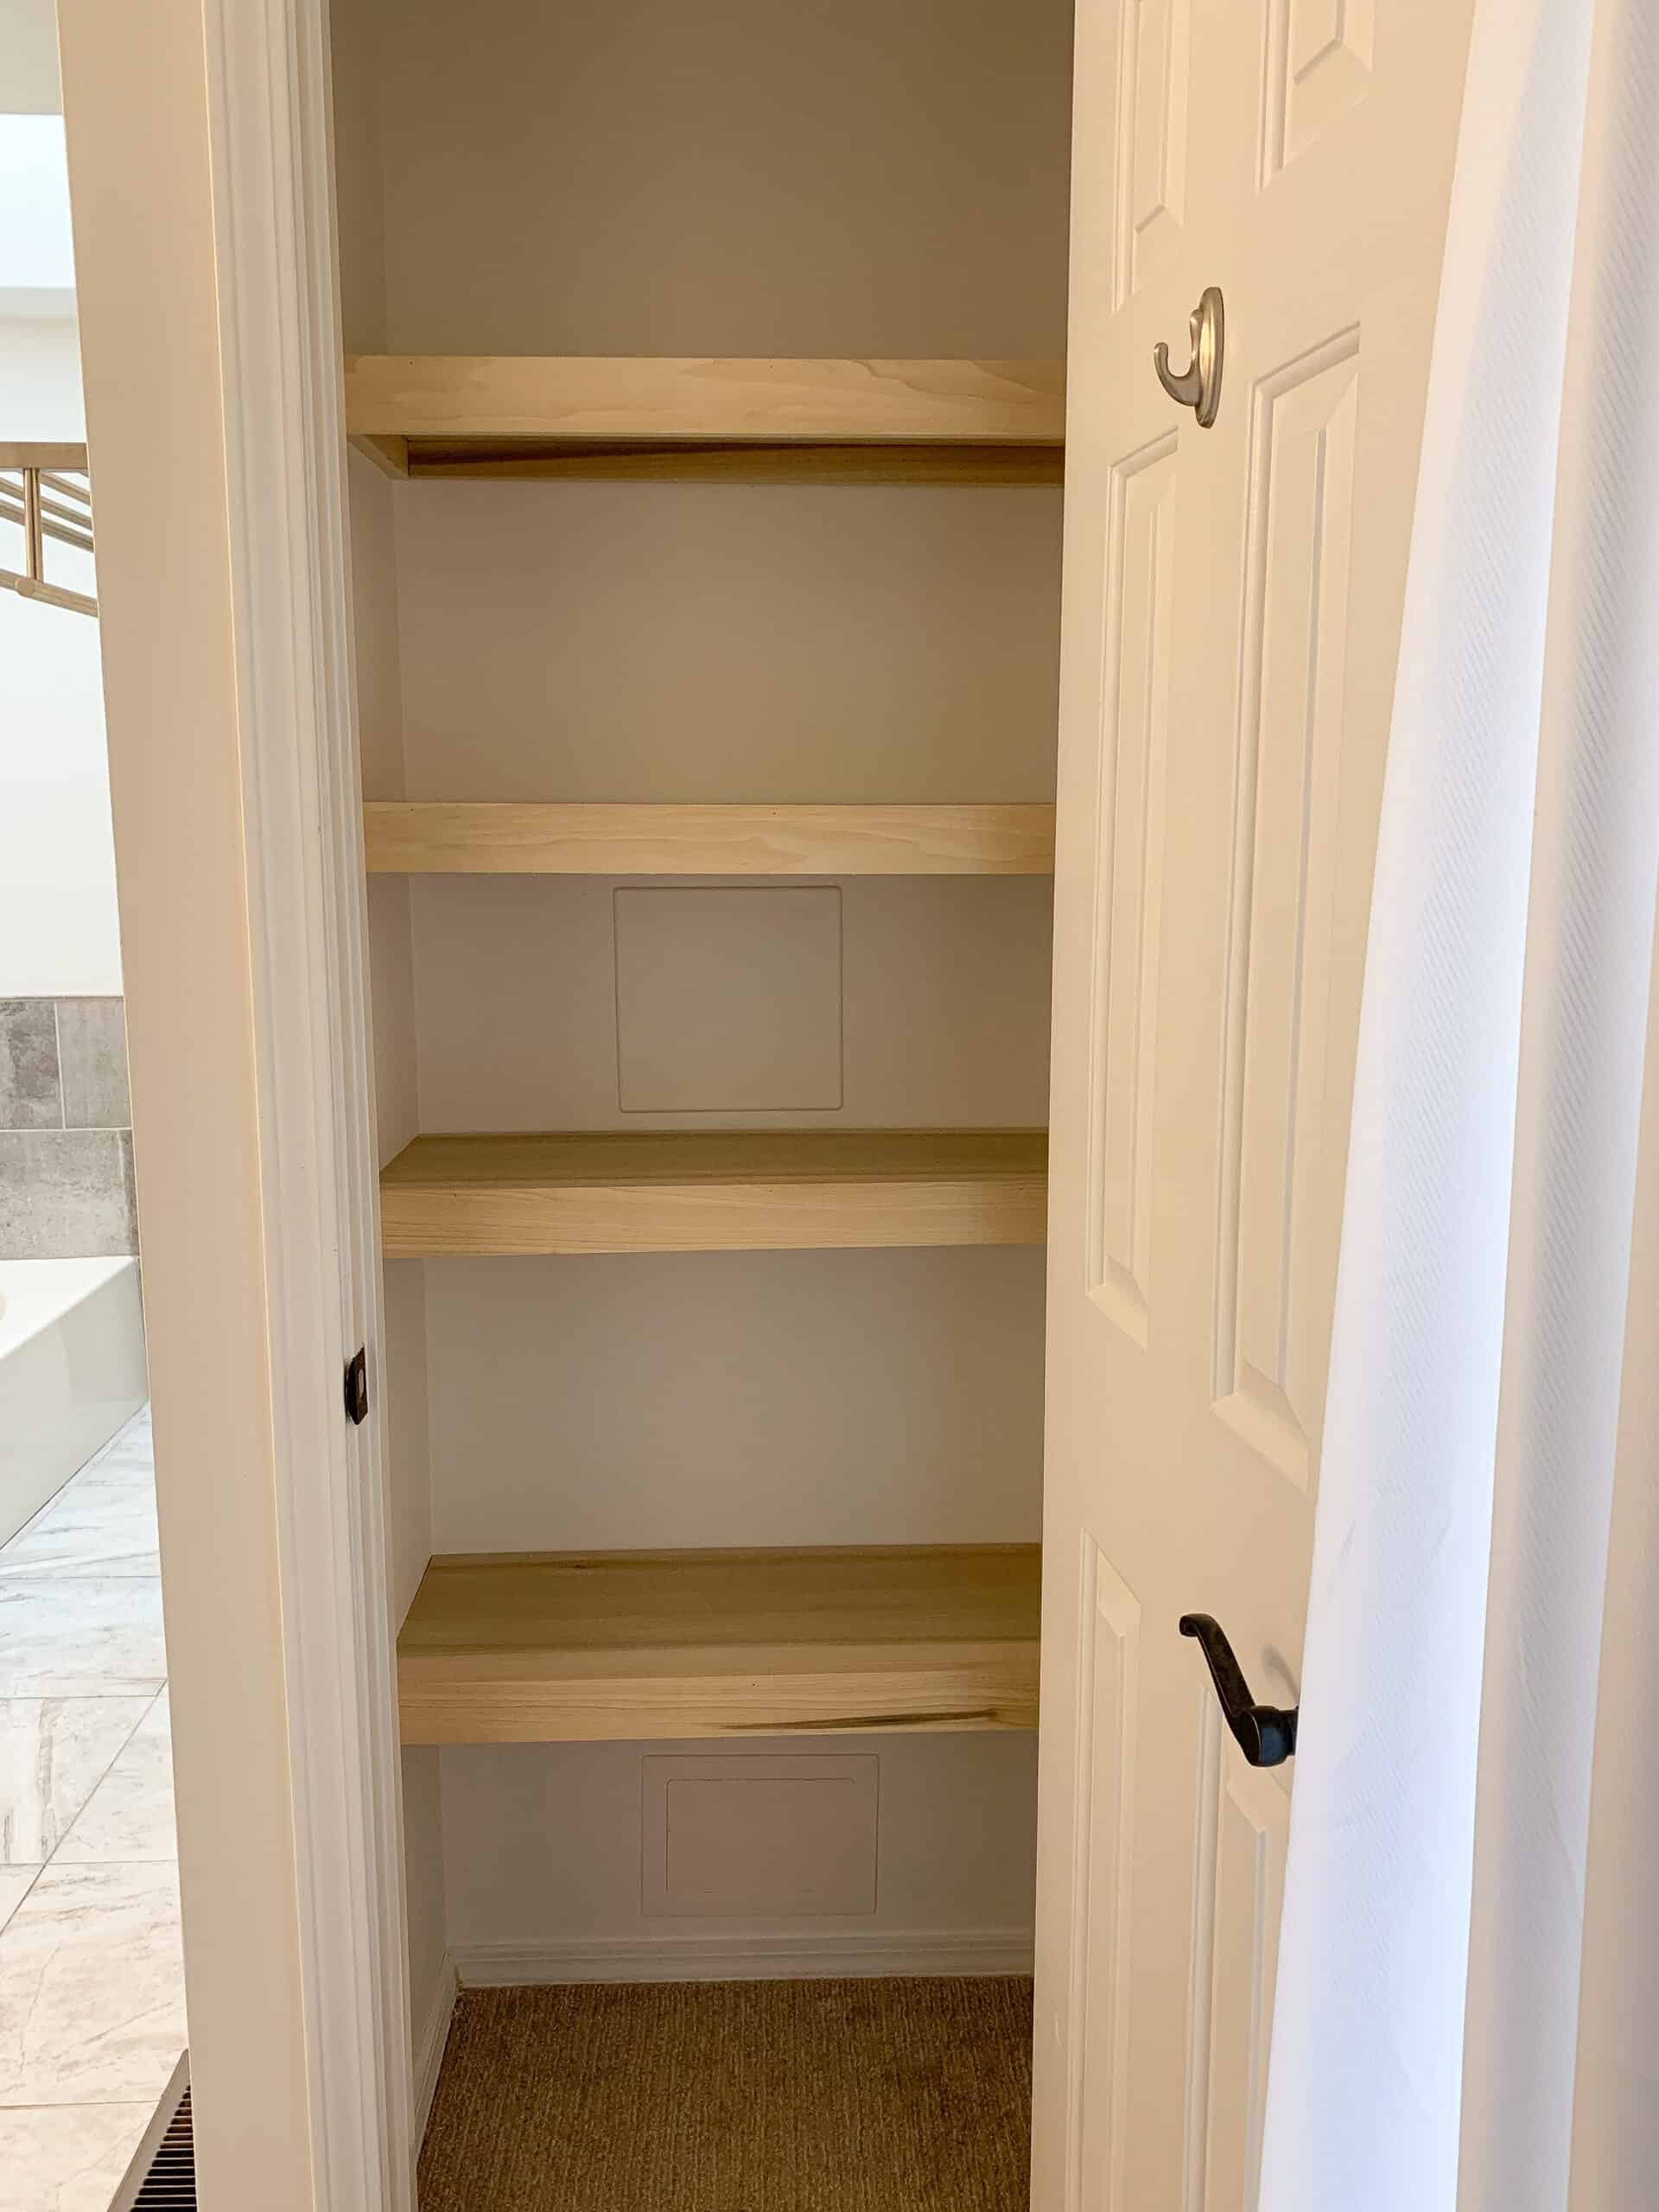
The linen closet we tackled first is correct exterior our main bathroom in our chamber and we are in it every mean solar day, then I actually wanted to see it more functional and requite it an update that looked nicer. It concluded up being a really piece of cake DIY and nosotros are already at the 'assembly' step for the kids linen closet too.
Dwelling house Declutter Challenge
Before I get started on this DIY let me recap why I did it and what I'm talking near when I say 'six bags for six weeks'. My friend Jen and I are on 30 day declutter journey and taking yous all along with us.
During the half dozen weeks yous will declutter every surface area of your habitation with a helpful chart to remind y'all of all yous need to purge, as well as a chart to track how much you accept actually gotten rid of. The terminate goal is a minimum of 36 bags of items OUT OF YOUR Business firm. This can mean donate, sell, trash, whatever works!
Week 3 Focus Area:
This week we are tackling bathrooms and linen closets. I talk at the end of this post a flake virtually how I organized ours, but Jen did a full blog post on organizing bathrooms, so she will be your resource this week!
Week 3 Invitee:
This week nosotros have my friend, and beau St. Louis blogger, Val joining us. She is sarcastic equally a first linguistic communication, the ultimate deal finder, and keeps it 100% real on her Instagram page.
Val has 3 kids with her 4th due in only a few weeks! Be certain to check out her blog here, and her Instagram here to learn more about her!
Calendar week three Prize:
Equally with previous weeks, there will exist a weekly prize for 1 person who participates in the giveaway, and I am REALLY excited nigh this weeks! We accept teamed up with Golden Ringlet to give ane of yous a fully custom planner!
When I was on the hunt for my planner this year I found Golden Curlicue and purchased one, simply to fall in honey. I can't wait for one of yous to try 1 likewise and get organized in your all around life for 2022.
DIY Cupboard Shelves-How to Make Unproblematic Shelves
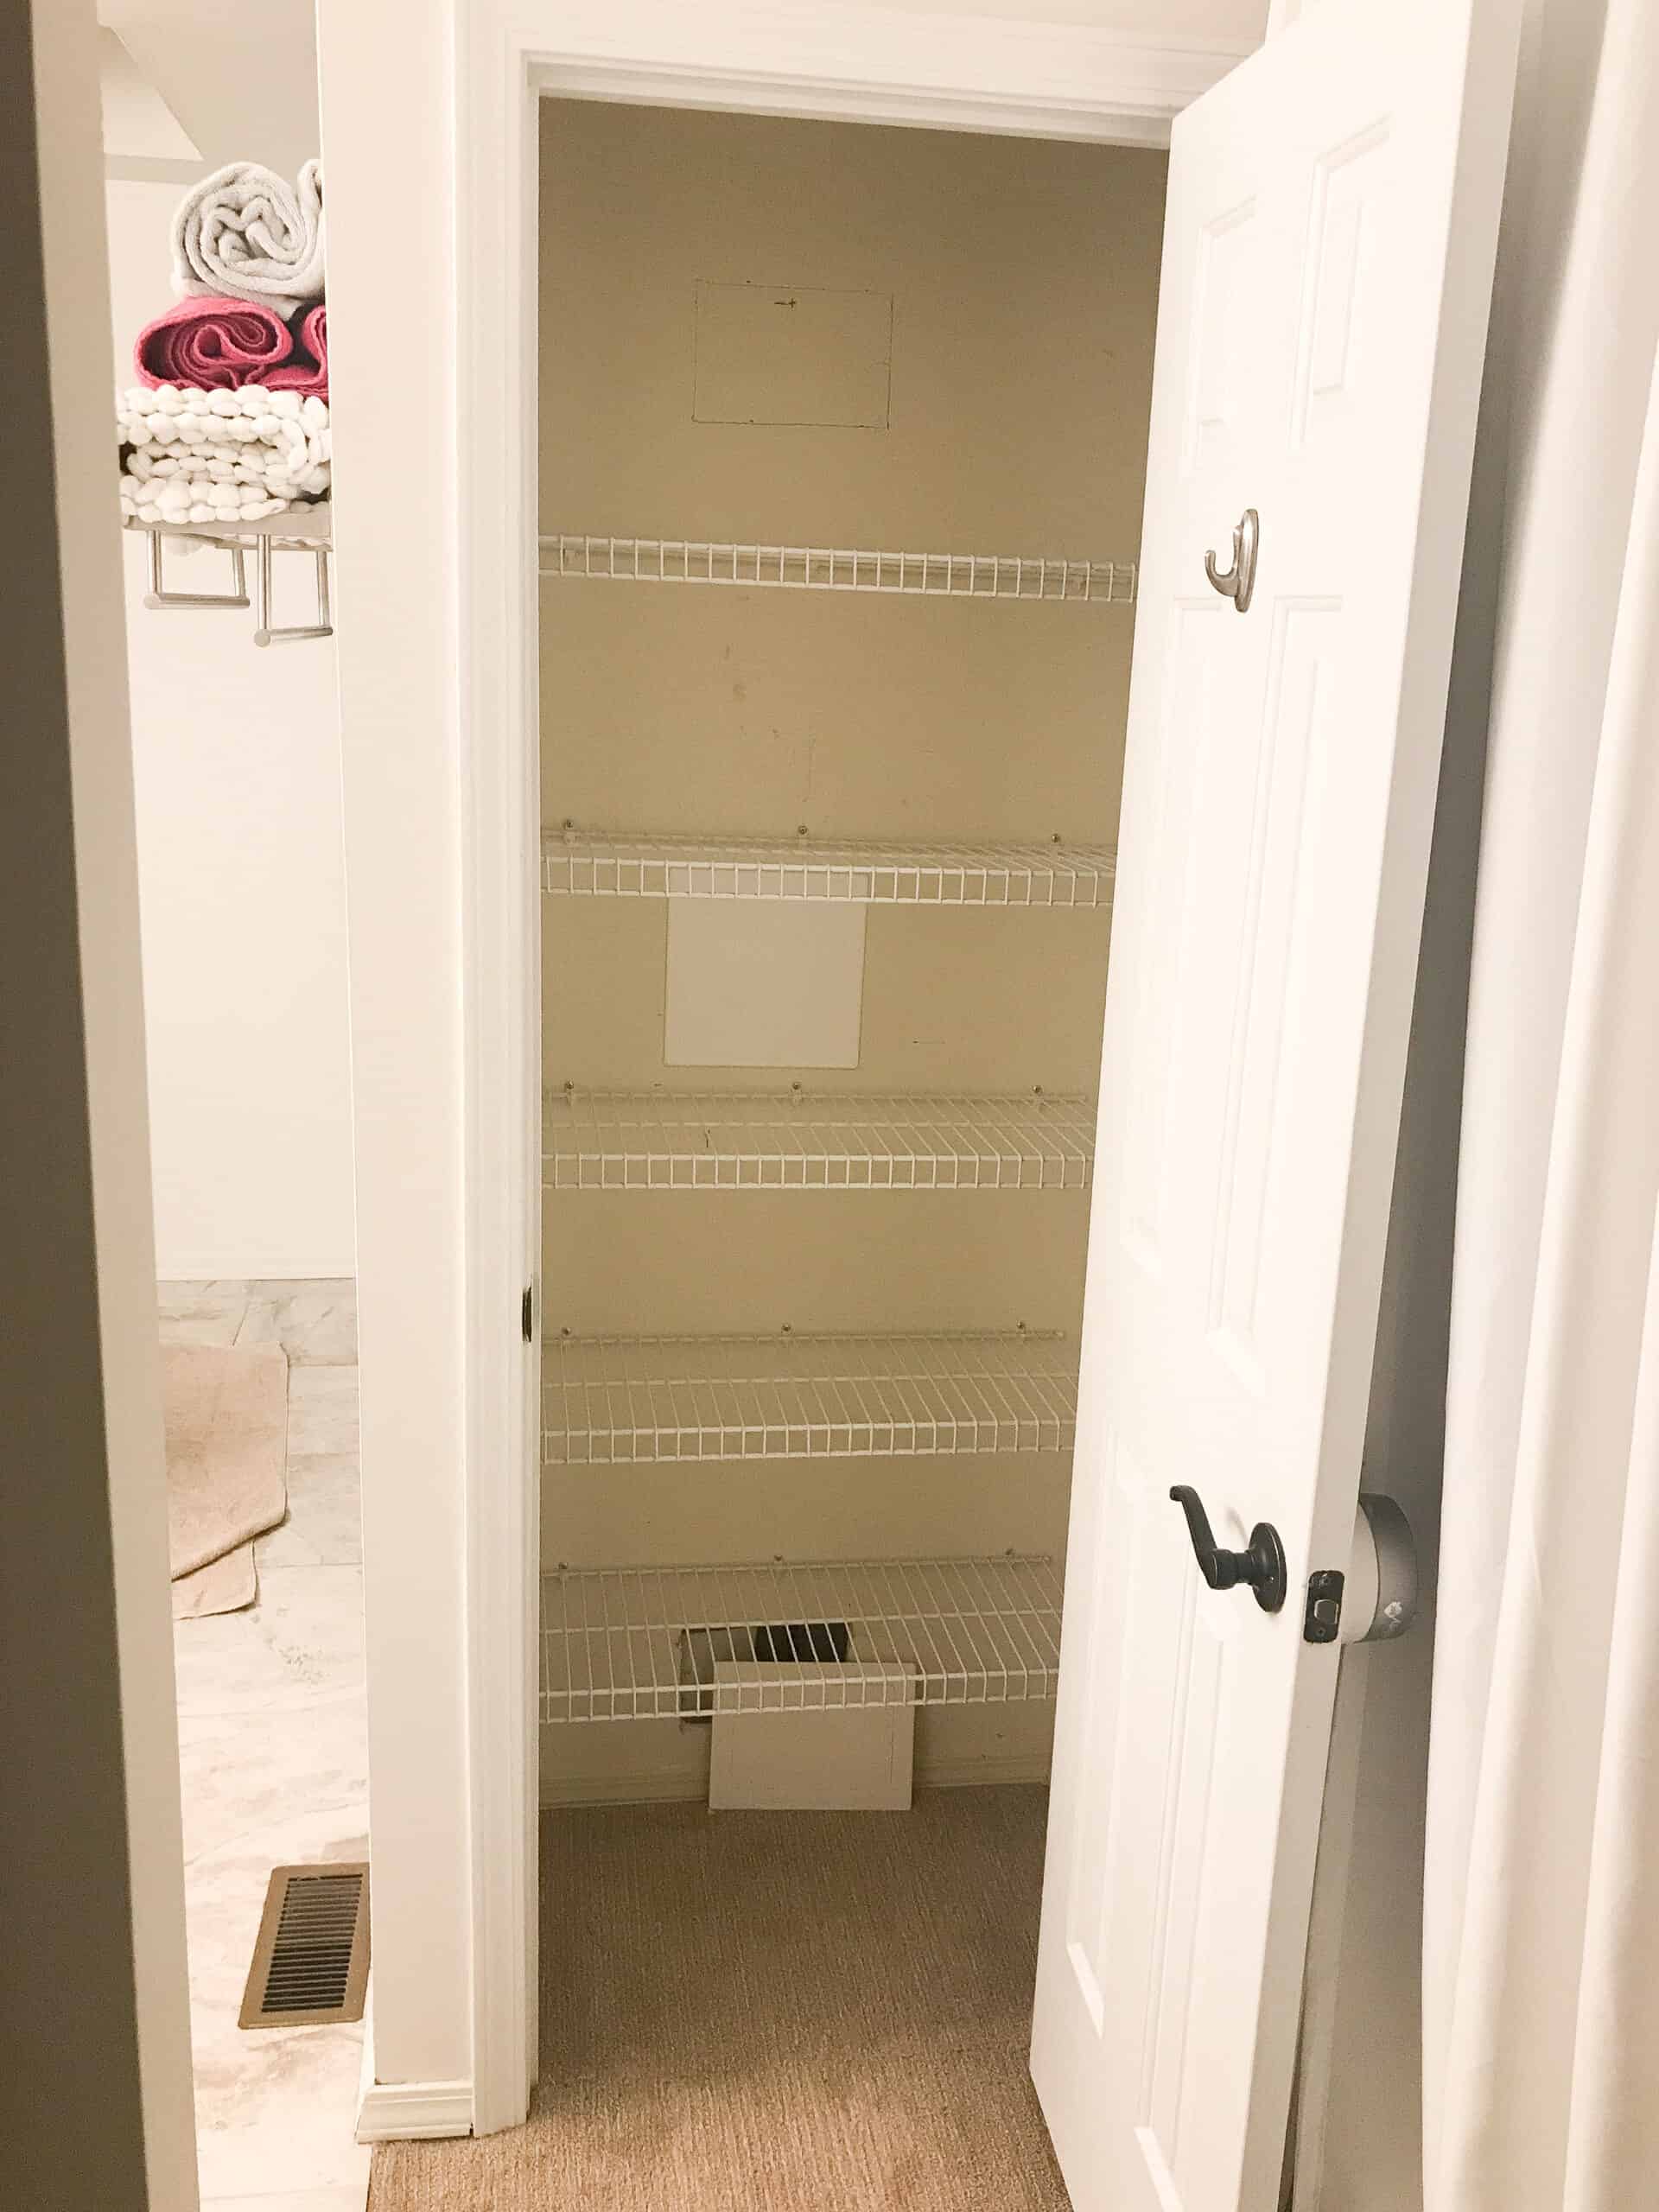
Okay now onto the closet shelves DIY! Like I said at the starting time of this post – our shelves in this house in EVERY cupboard bulldoze me mad. They are all wire, and our business firm is from the late 80s, so many of them just are not in skillful shape at this point. When it came to organizing closets, it fabricated sense to get things in better shape.
We are on a mission this yr to really tackle some projects around our house in DIY style and tin't look to have you all along with the states, so if piece of cake, LIKE Just REALLY EASY, DIY is your affair brand certain y'all subscribe to my blog and follow along on Instagram to see more of these projects.
Full Breakdown:
Cost: Lumber was $100 but we purchased for 5 shelves and decided to do 4. Nosotros personally owned everything else! So information technology was VERY inexpensive. (editing to add – I only did these again three years later and again the lumber was roughly $100)
Fourth dimension: Disassembly – 10 min, Putty and paint – 1 hr (that doesn't include waiting fourth dimension), Cut and Associates – one hour.TOTAL – ii ish hours!
What You Need:
Lumber amounts will differ based on your shelves, merely I will give you lot a breakup. As well, we used tools yous may non have. I will share the tools we are using, in case you lot want to slowly invest in them and bring together us in the coming DIYs.
We have institute that projects just get so much easier and become so much faster with the correct tools.
Lumber: What Kind of Wood Is Used For Cupboard Shelves?
How thick should wood be for shelves?
1×2 Poplar Board – this will exist your frame. You will need enough to go along the two sides and back for each closet shelf. Our shelf top was going to be 30.v x12. So we needed 30.five inches + ten inches for each side (take 2 inches off your side pieces, so for united states of america 12- two = 10).
To try to brand that more clear. Our table elevation was 30.five x12
Our frame pieces were cut for each shelf at 30.5 + 10 + 10
Total amount of i×2 we used was 142 inches.
i×12 Poplar Board – This is your shelf top! For u.s.a. nosotros went with these boards that were already 12 inches. BUT if you have much deeper closets or want a deeper shelf y'all volition buy 1x_ poplar boards for your shelf top. We were able to ask the men at Habitation Depot to cut the boards to length so each concluded up being 12×30.5.
i×iii Poplar Board – This will be your face slice to brand your shelves look pretty. You need the length of your shelf (for us 30.v inches) x the number of shelves!
Tools:
We used a blast gun for this whole project. We personally have this one from Amazon and love it, but you could also use a drill and drywall screws too as a hammer and nails.
A saw of some sort – this is up to you. We personally accept the following 3 tools that would all piece of work, but for this projection used the miter saw selection as it tends to exist the easiest.
Tabular array Saw | Circular Saw | Miter Saw
Drill for attaching support pieces – we have this drill.
Other:
Spackle
Wood Gum
Paint if you plan to repaint the closet before install (highly recommend)
Small foam rollers
Sand paper
wood filler
Matte Wood Sealer
Level
Stud finder (optional if you are trying to get nails or screws into studs simply this one is our favorite)
How to Build your DIY Wood Closet Shelves
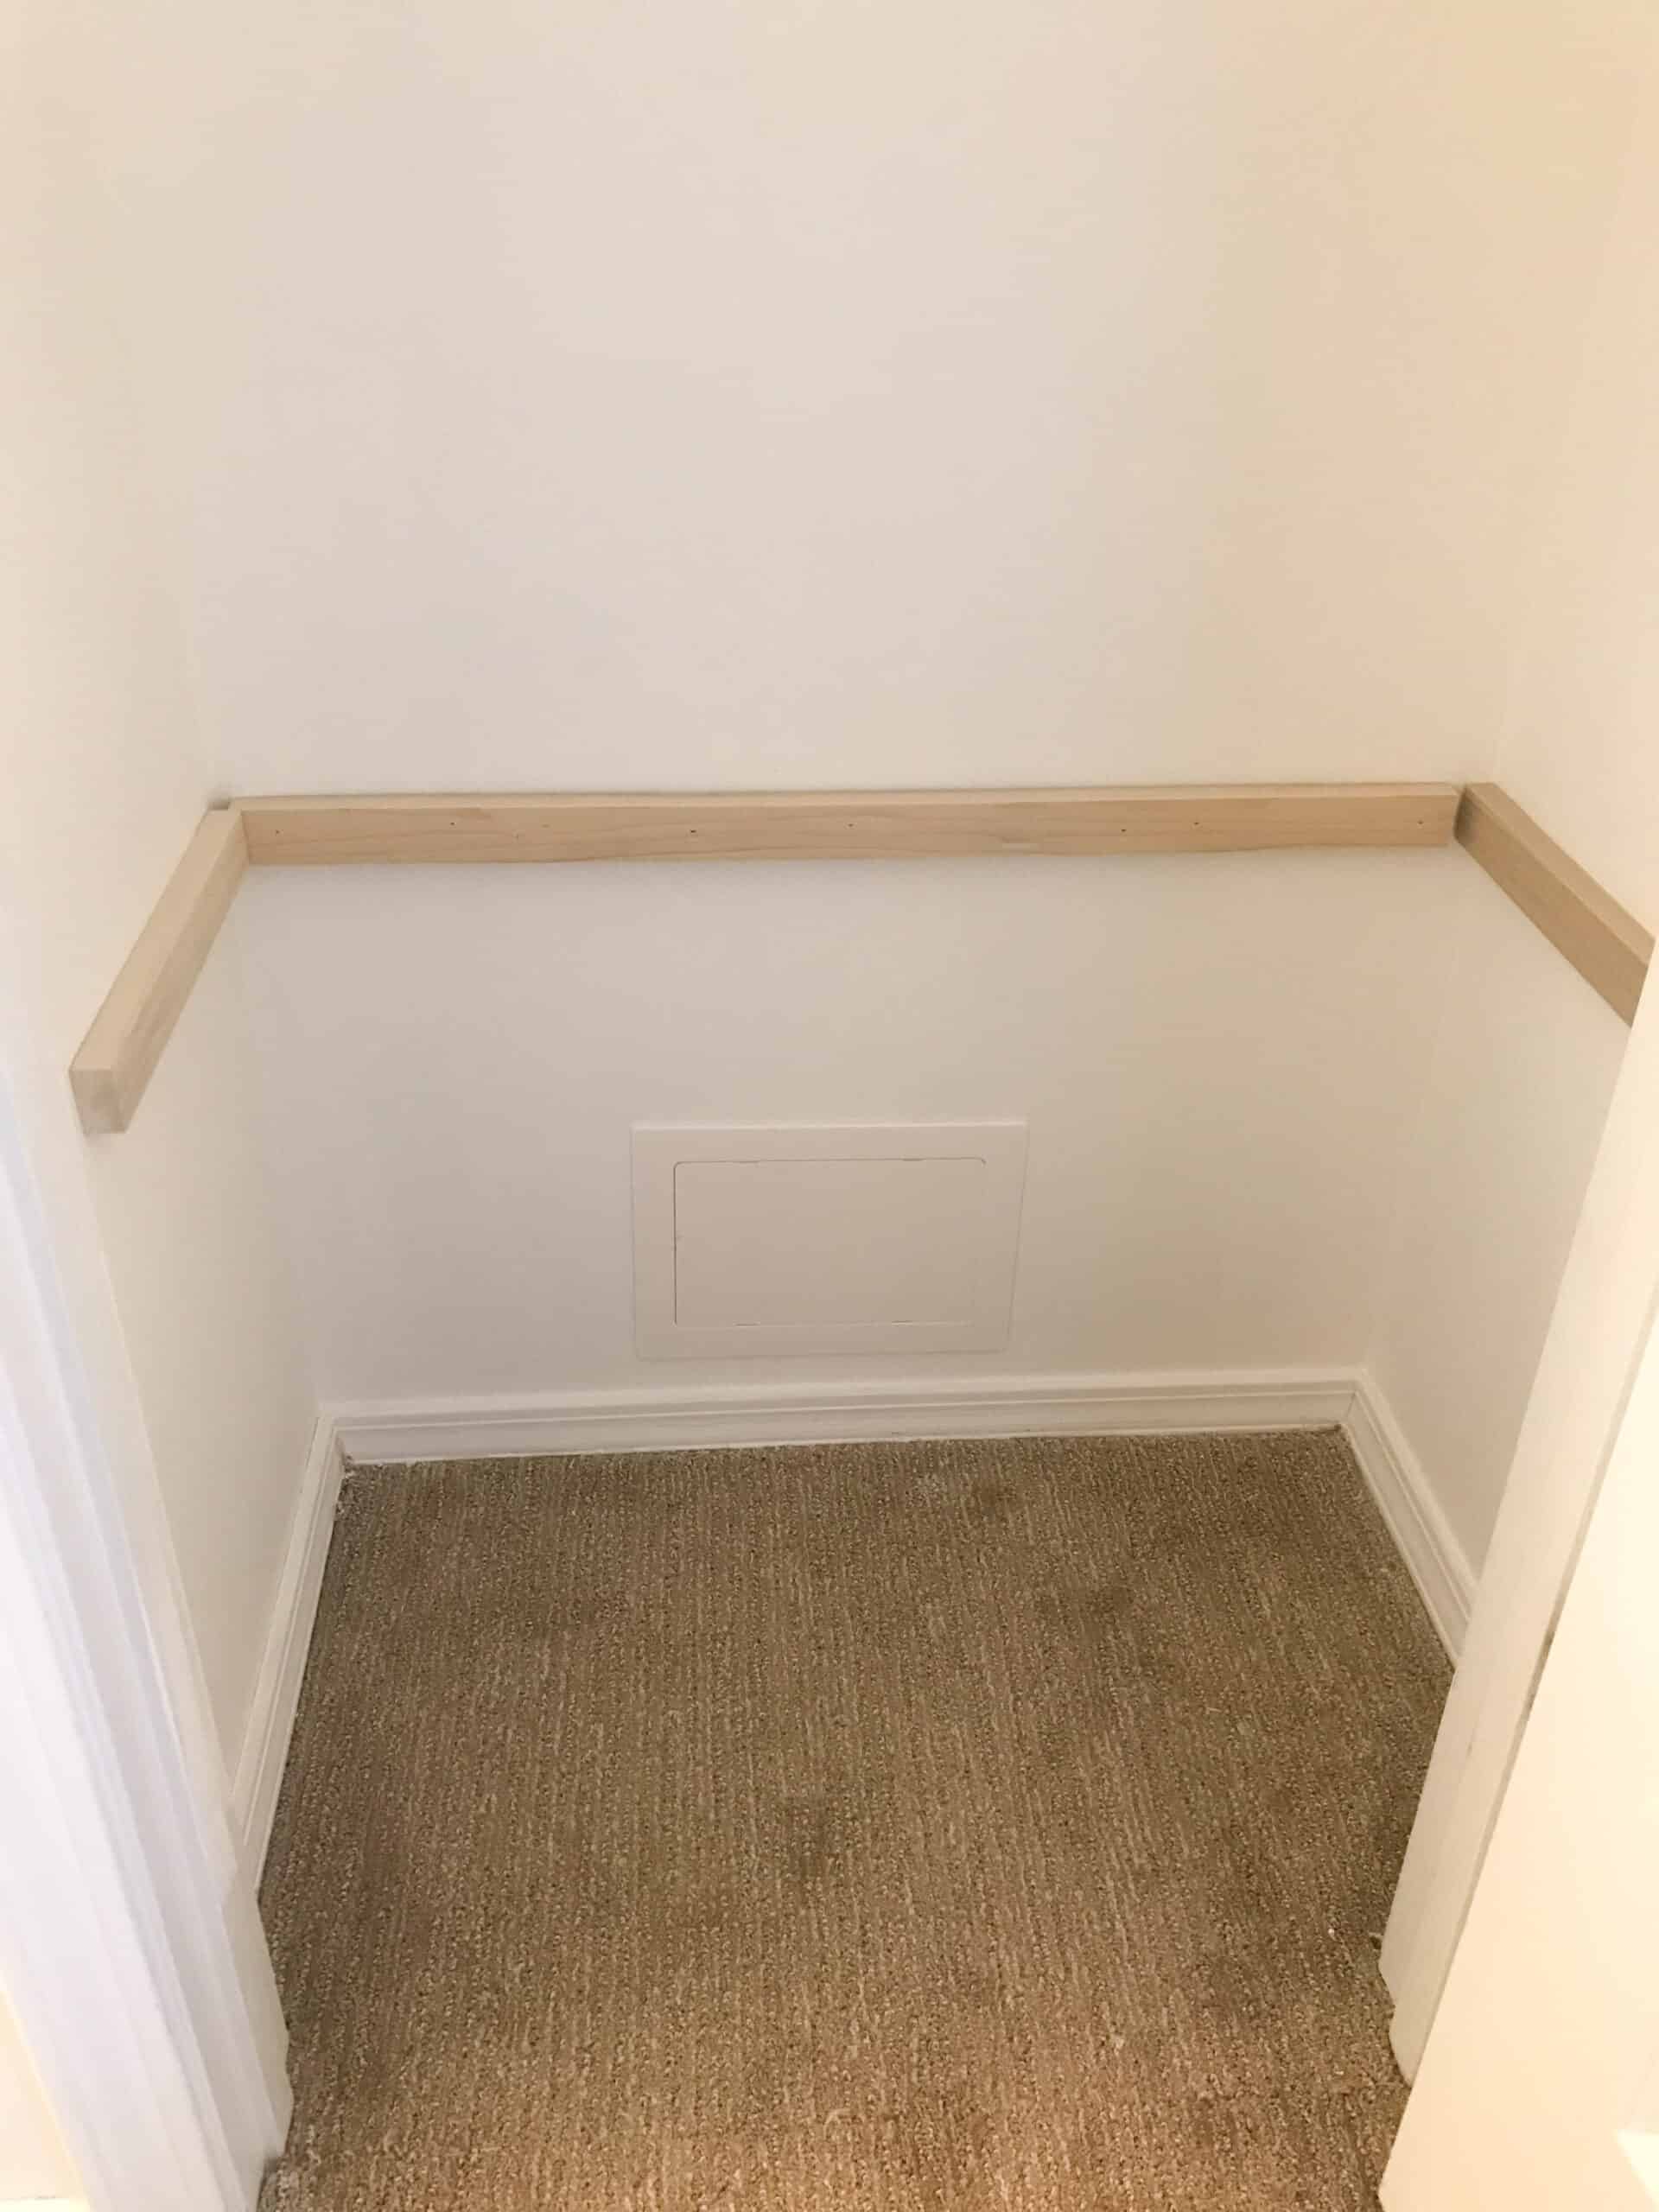
- Showtime things first – dismantle your electric current shelving. Patch whatever holes with spackle, then when that is dry sand and fully make clean the walls.
2. Next yous want to pigment the closet fully. We used paint we had on hand, and personally did each of these steps a nighttime.
iii. Cut your lumber – If y'all are personally cut this at home, cut your lumber for ONE CLOSET SHELF to make sure your measurements were right. If they were great and so it'due south time to cut the lumber for all remaining shelves.
DIY Cupboard Shelves Assembly
Associates was CRAZY piece of cake with our smash gun, merely volition accept a bit longer without.
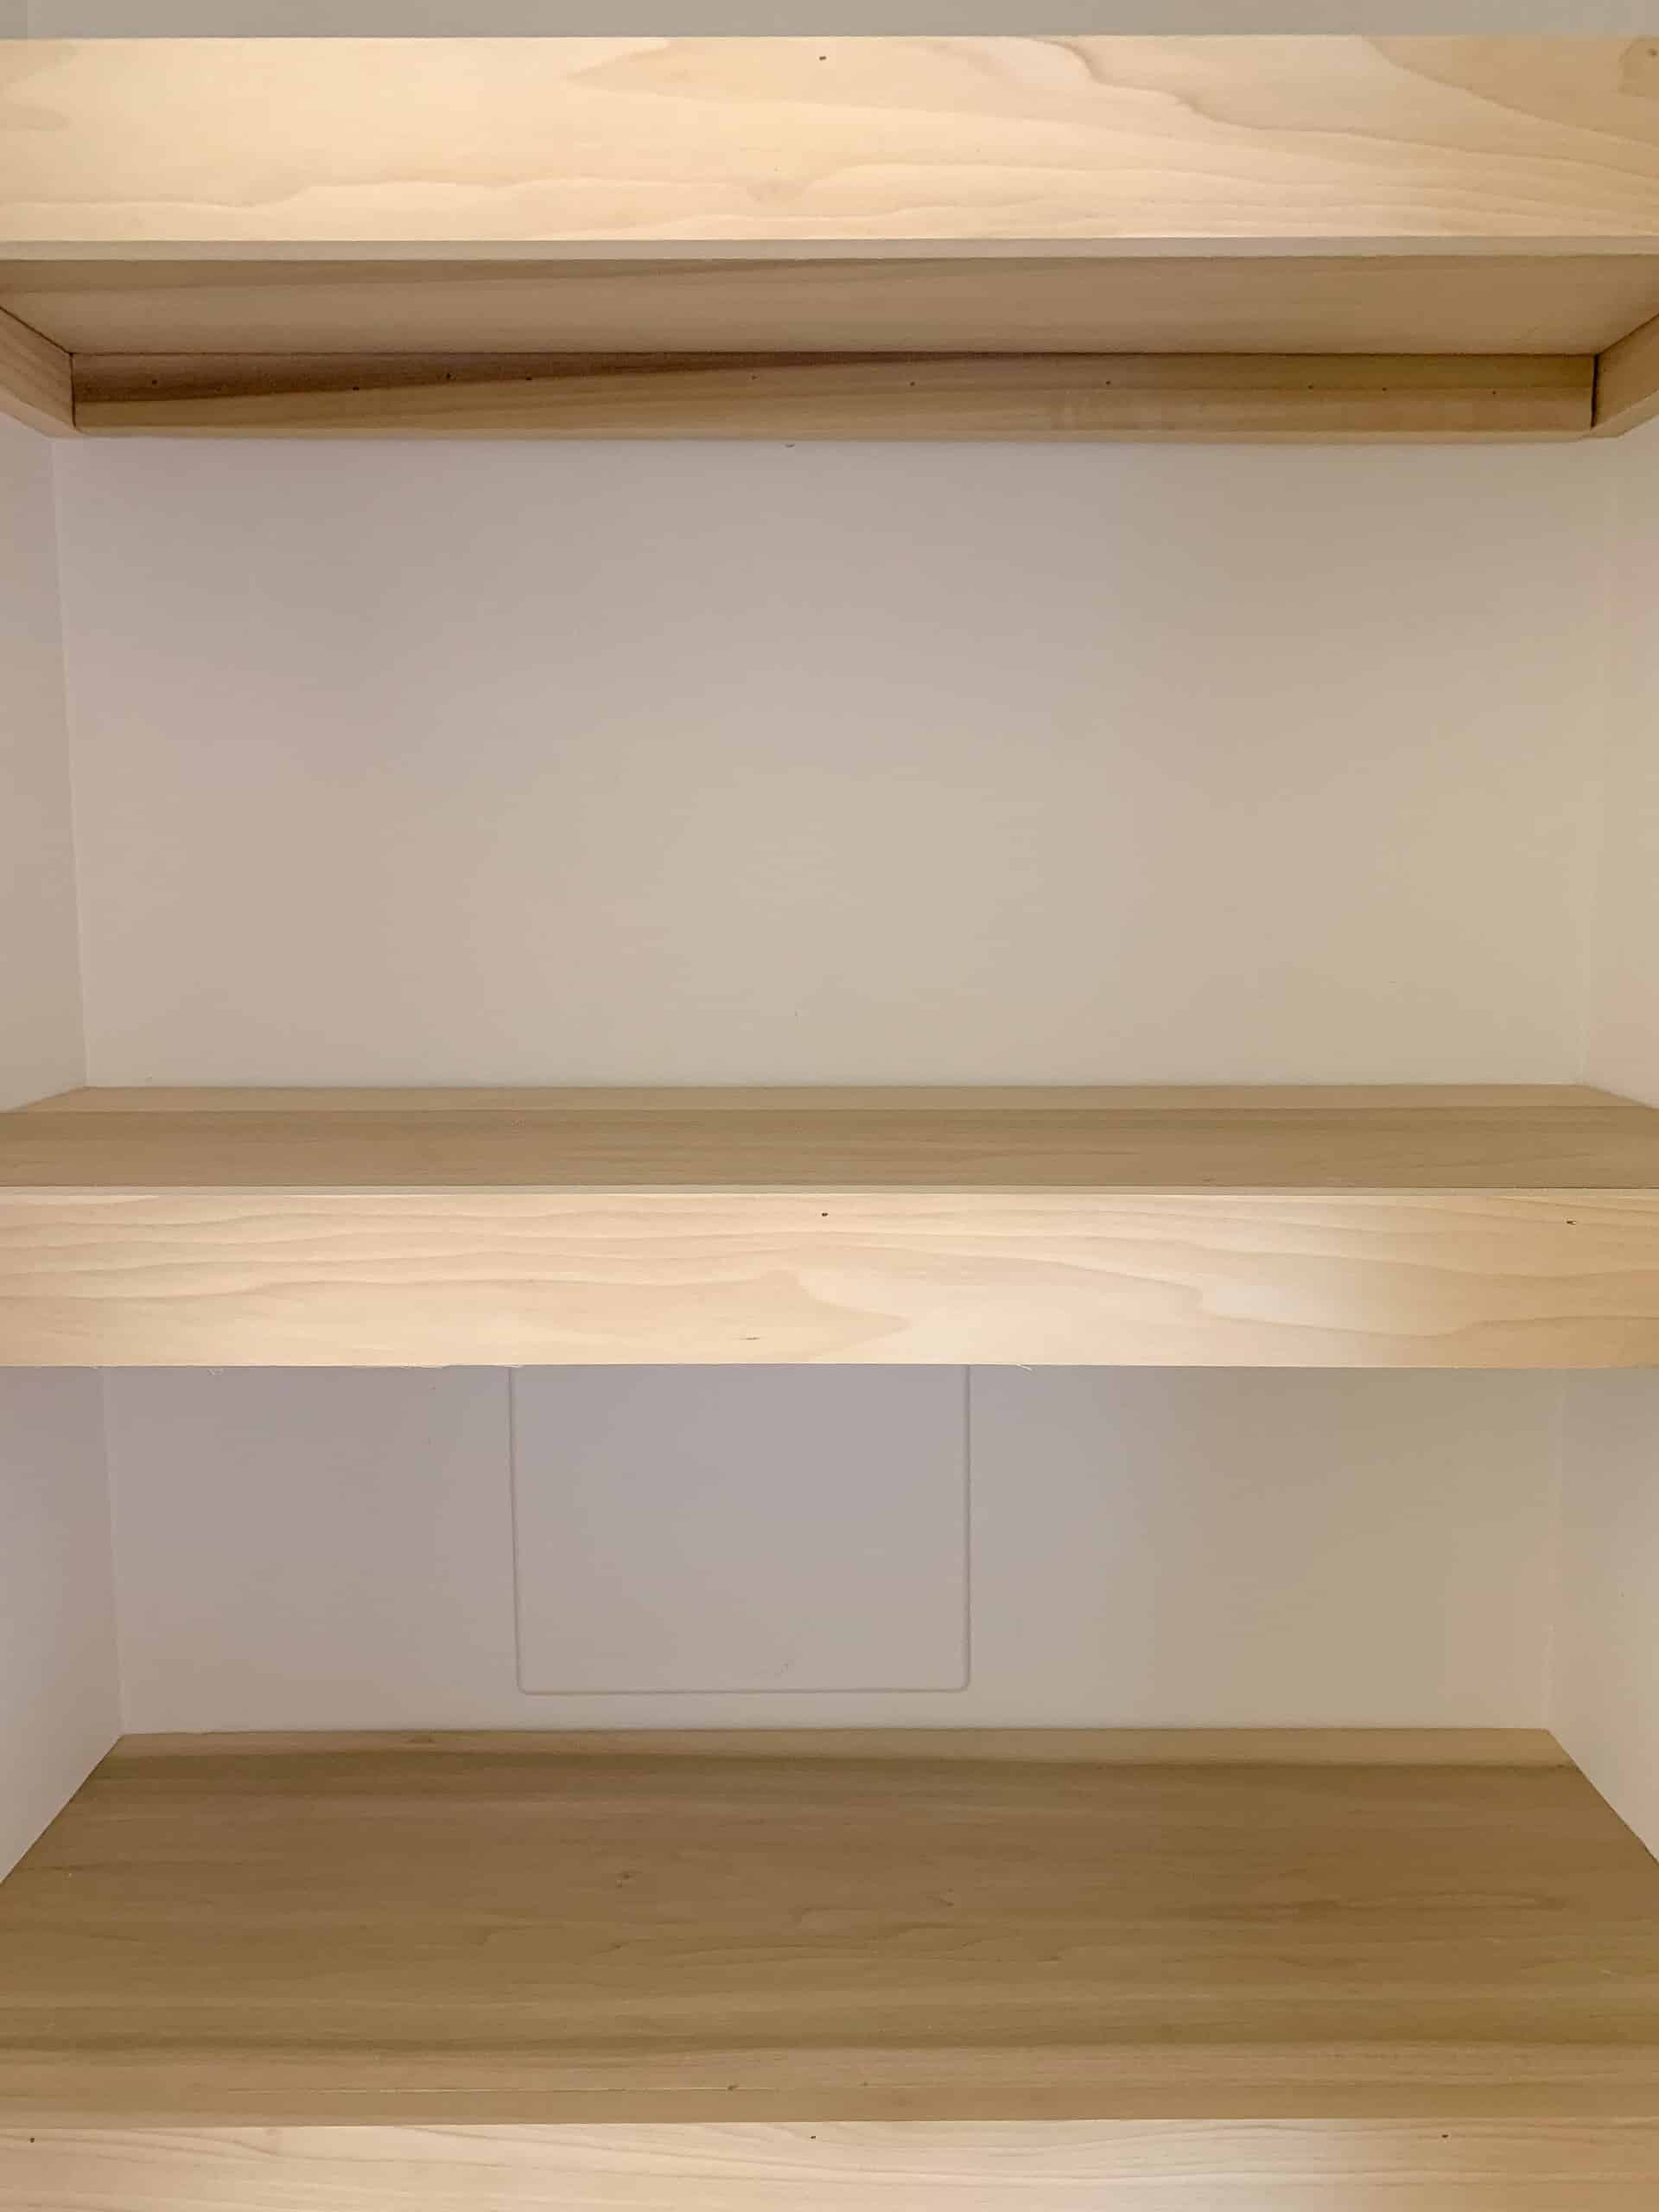
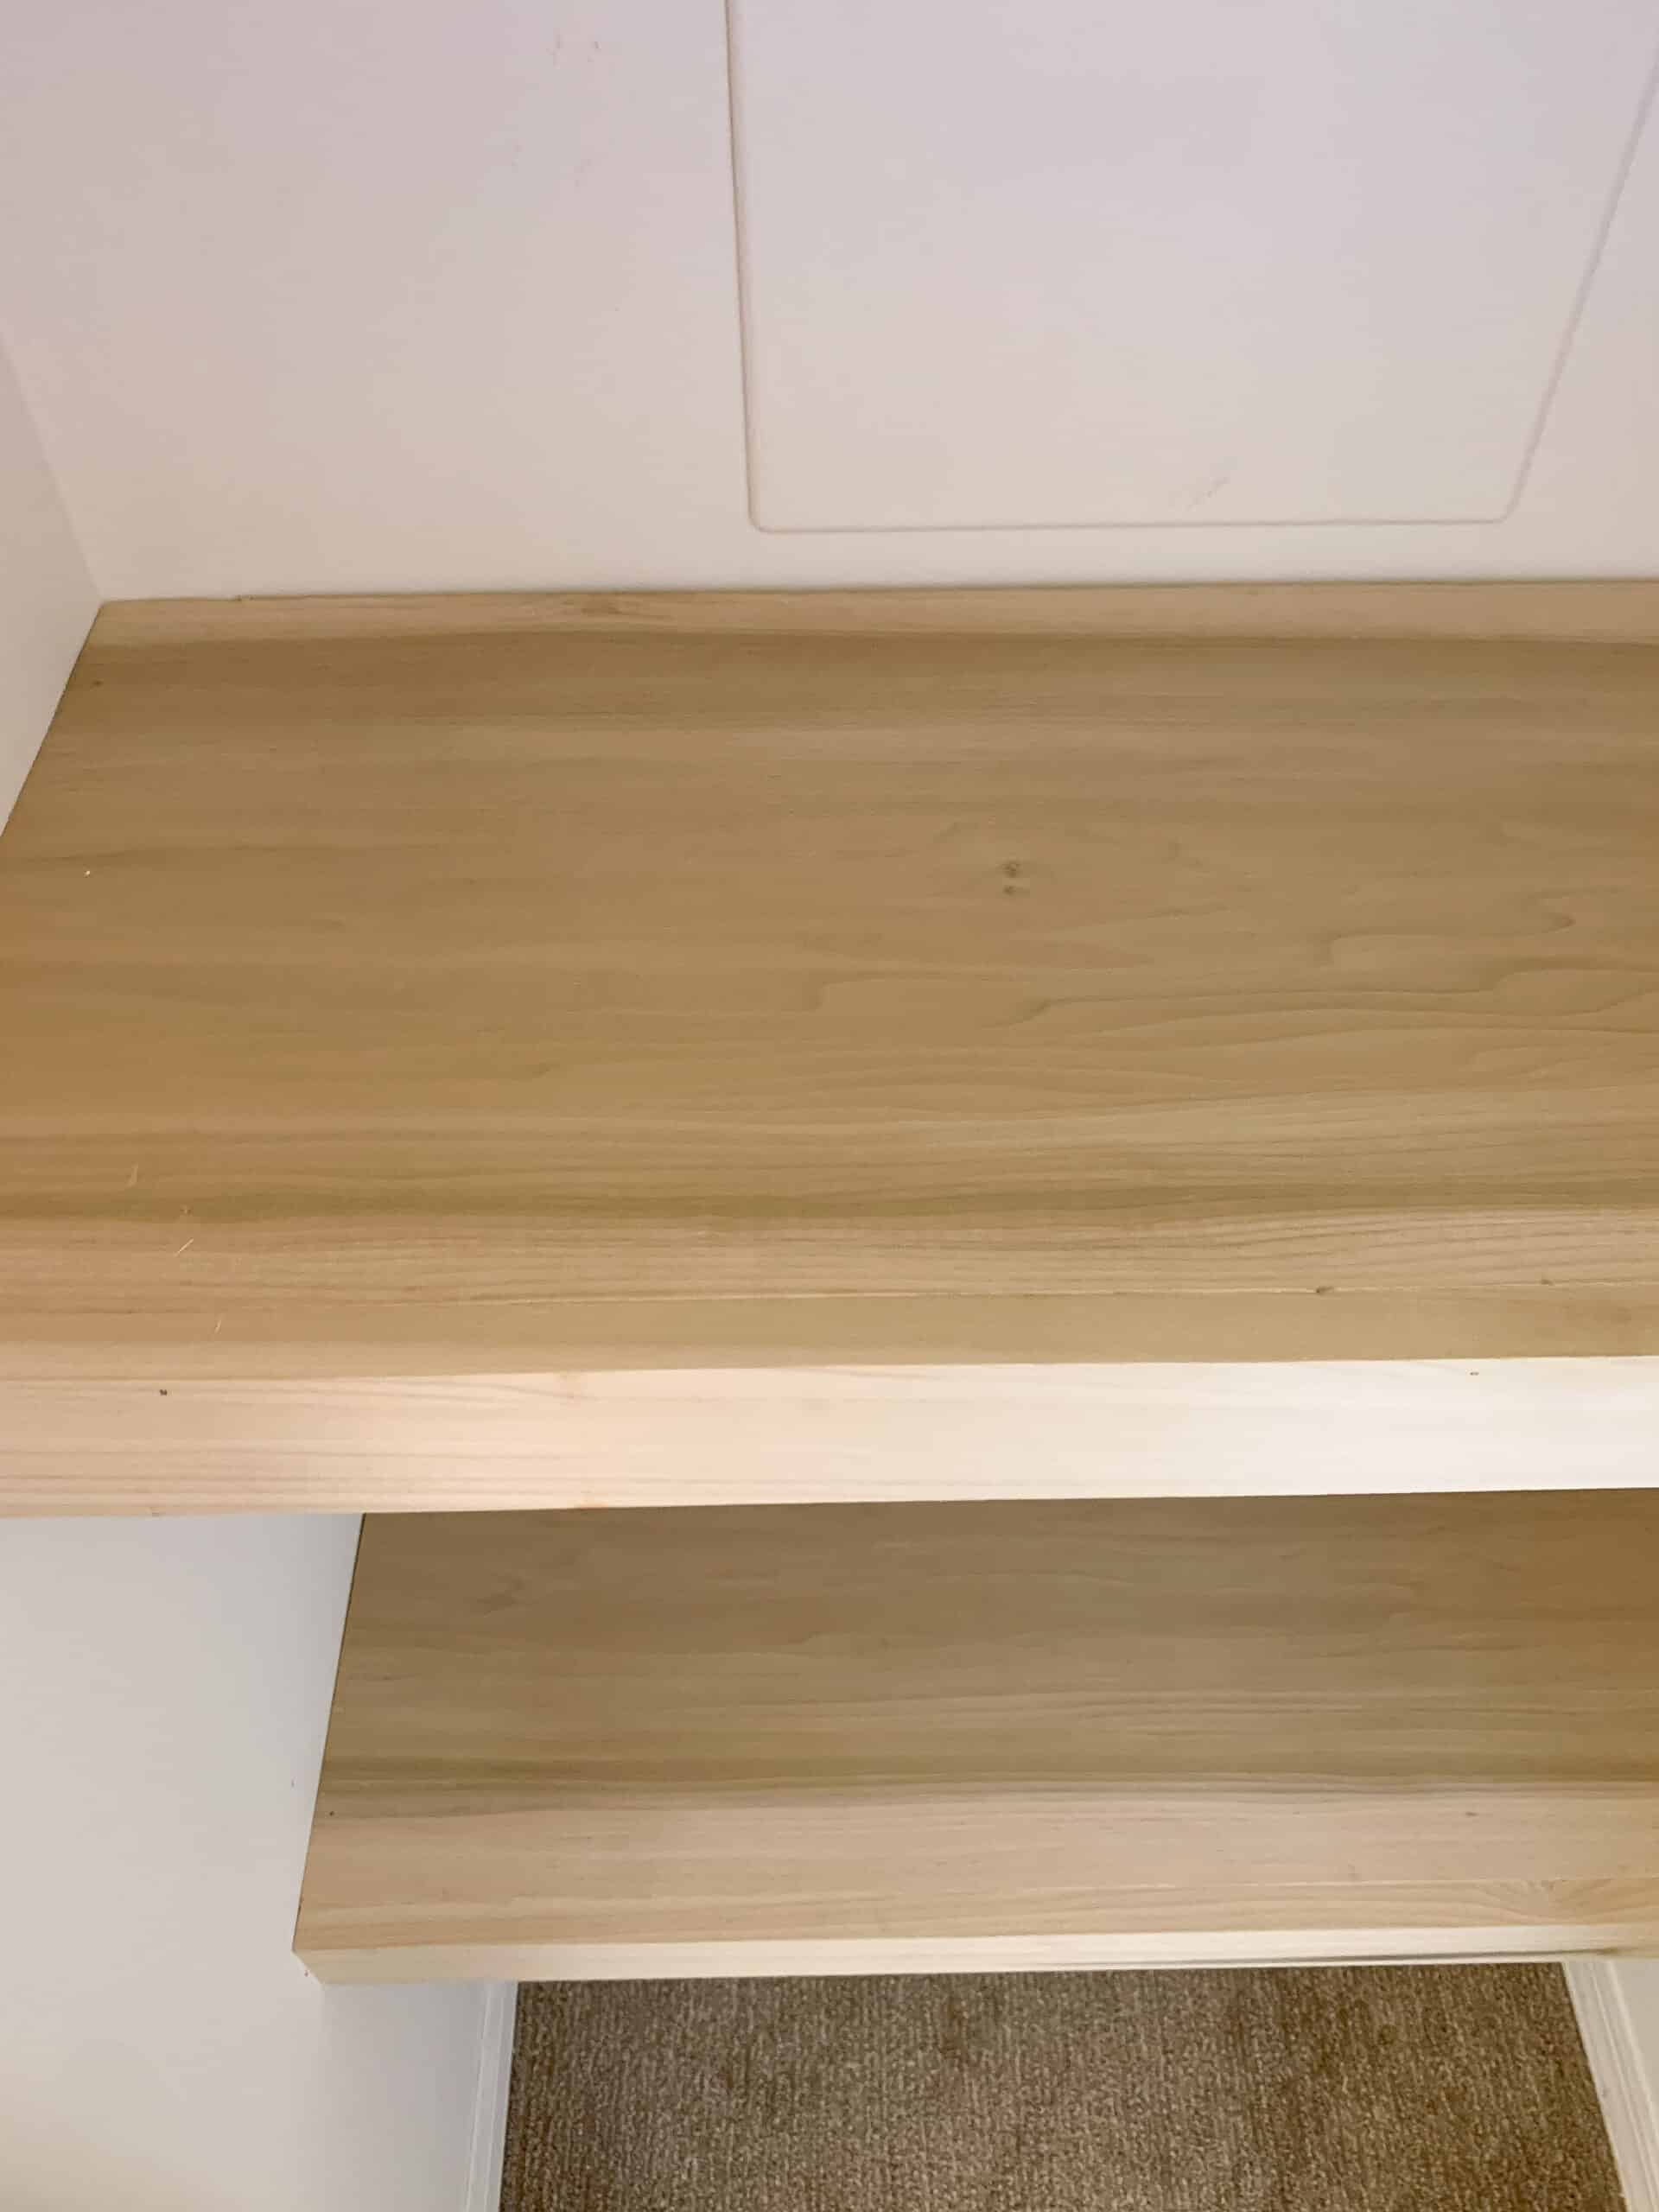
worth nothing – the photo of our frame, we did our cuts slightly differently due to trial and error. I am giving you the directions to do it how we will on closets going forward equally far every bit the longer back piece and shorter side pieces!
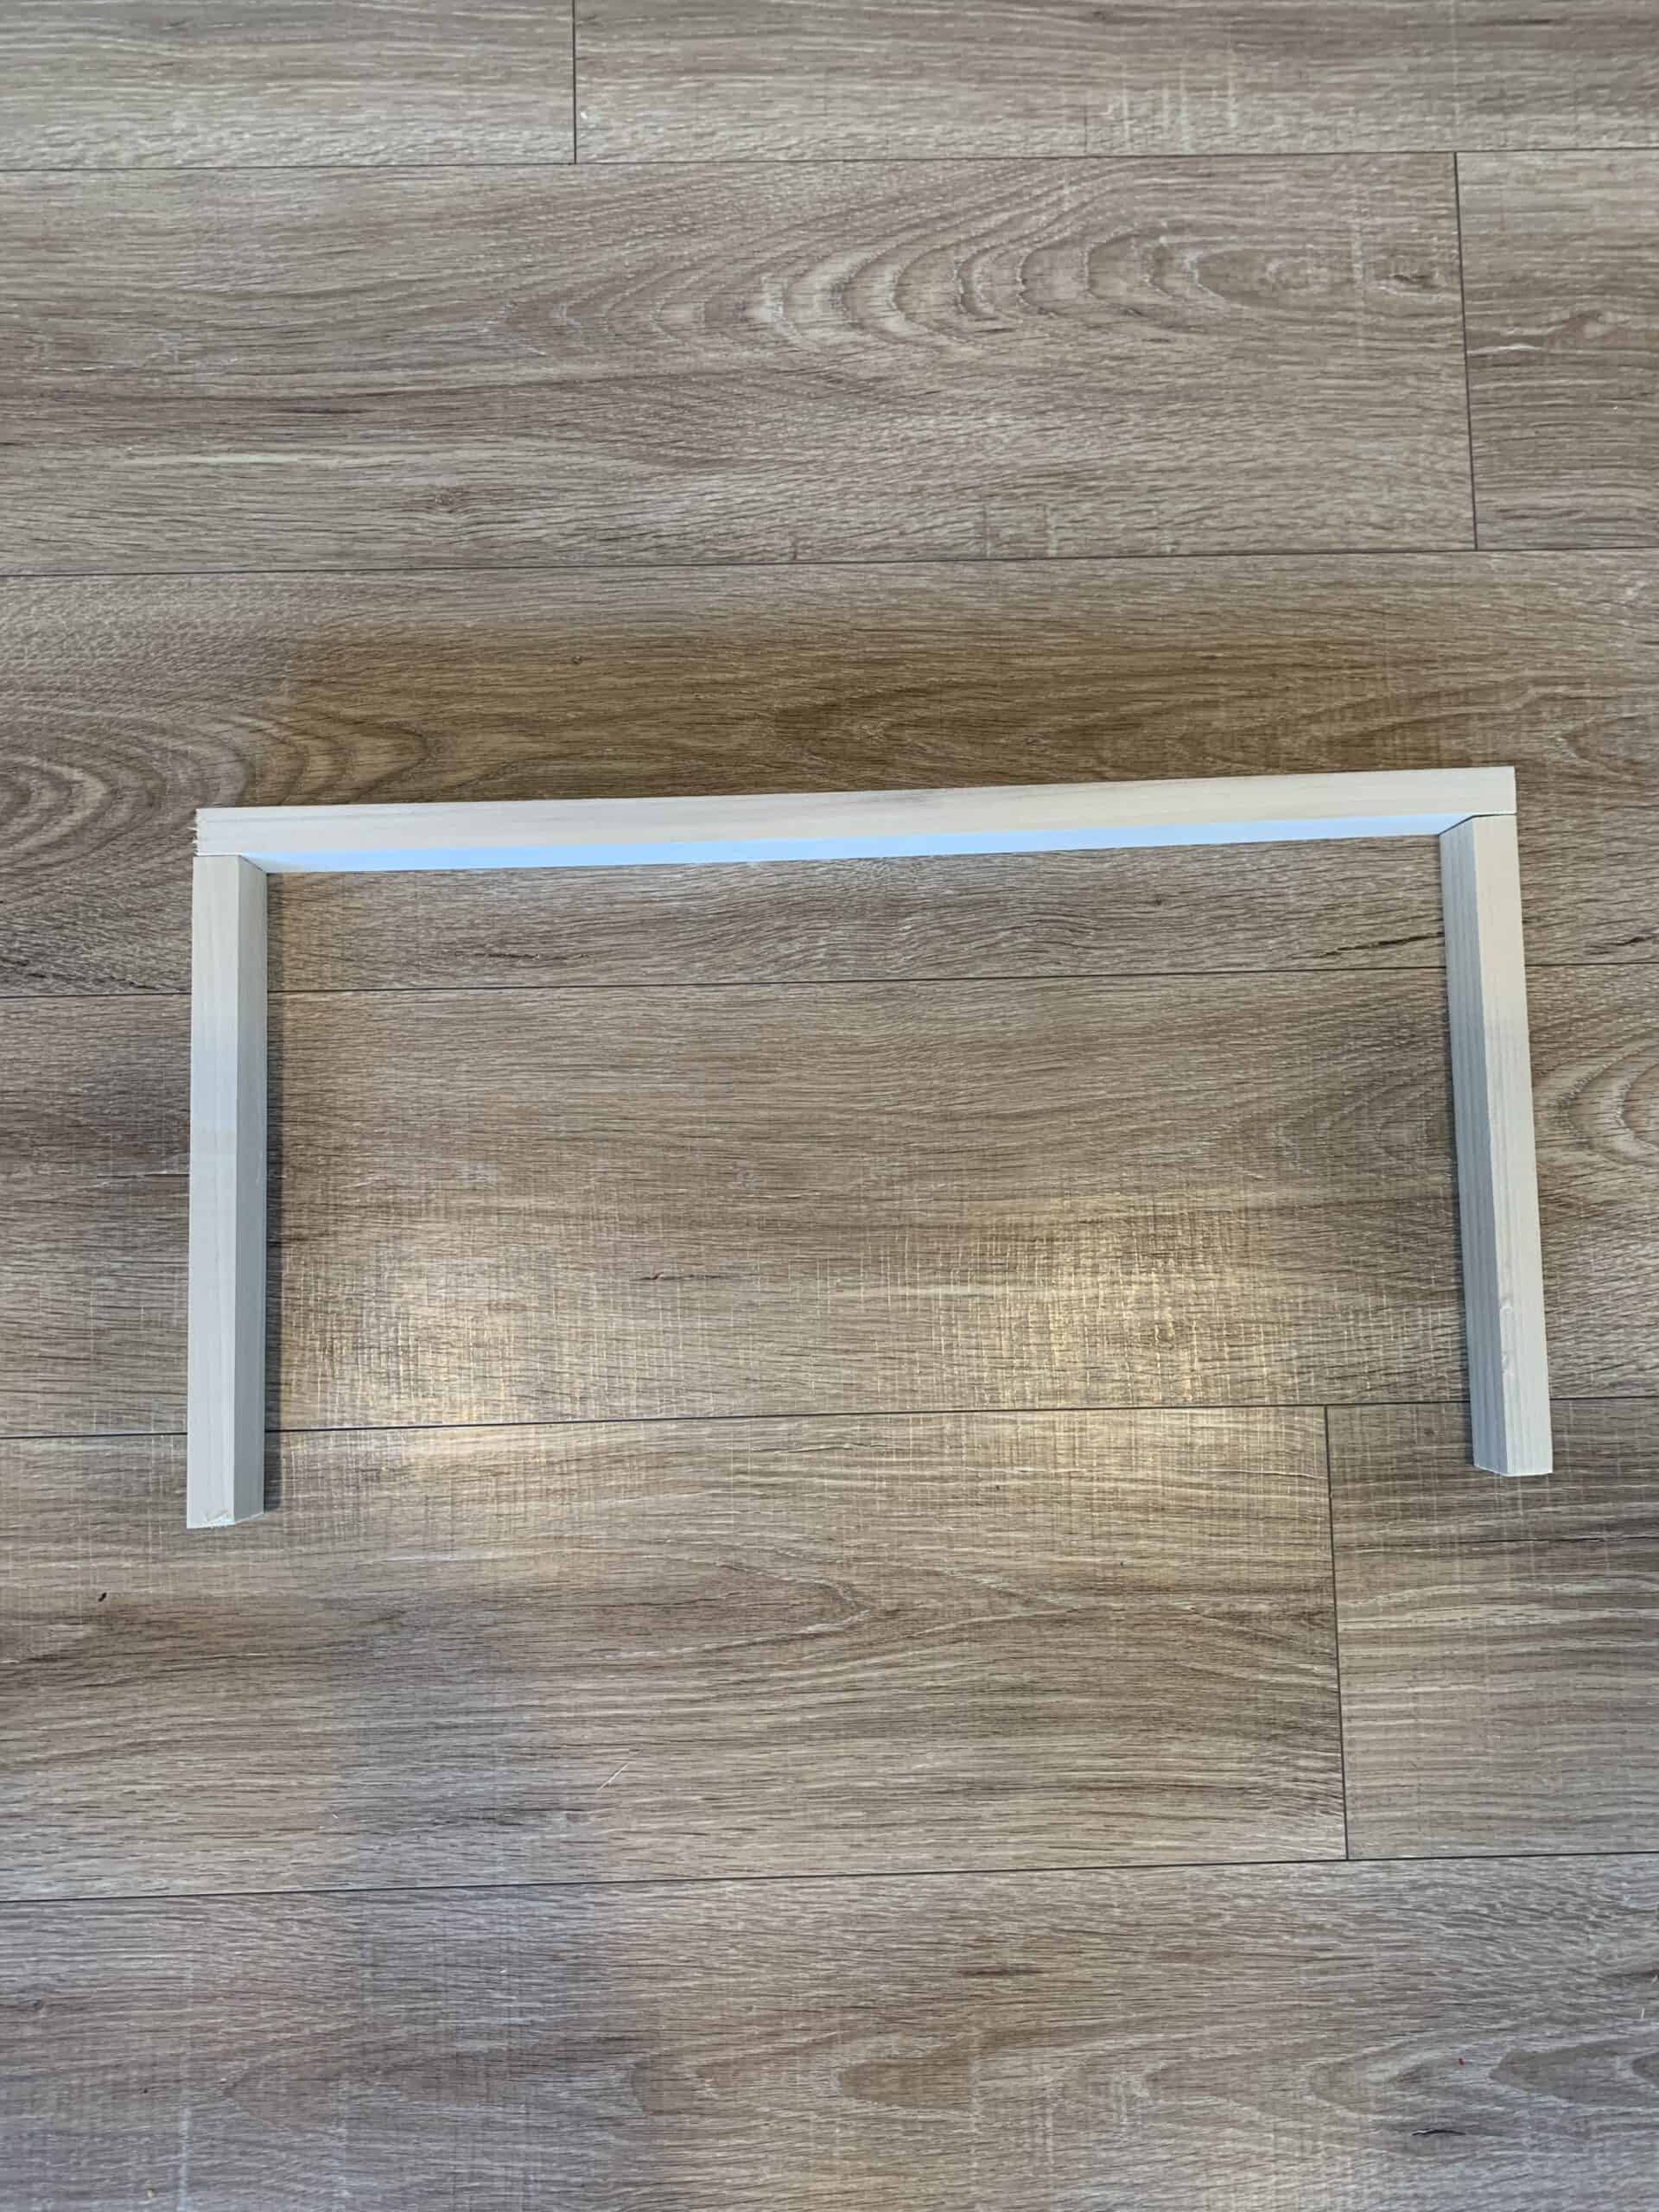
4. First attach your 1×ii against the dorsum wall where you want your shelf. Brand sure it is level as this is how you will support your closet shelf, and call up your shelf is one inch tall and will sit down ON TOP of this, so if that matters in terms of your placement exist enlightened. Utilize your drill to adhere this piece – if possible putting into the studs.
5. Side by side you will do your side pieces of one×2. Aforementioned height and push them as far back and close to the back slice as you can. Information technology's fine if in that location are gaps, but the biggest thing to recall is it tin't hang in front of your top board. Use your drill to attach these to the walls – and if yous can get them into the studs.
half dozen. Once all your frames are upwardly, it's time to put on the shelf tops. Take your meridian board (this is your 1×12) and identify it on your frame all the manner into the back corners so apply your nail gun or a hammer and nails to secure information technology. Adding wood glue will also go along it more secure.
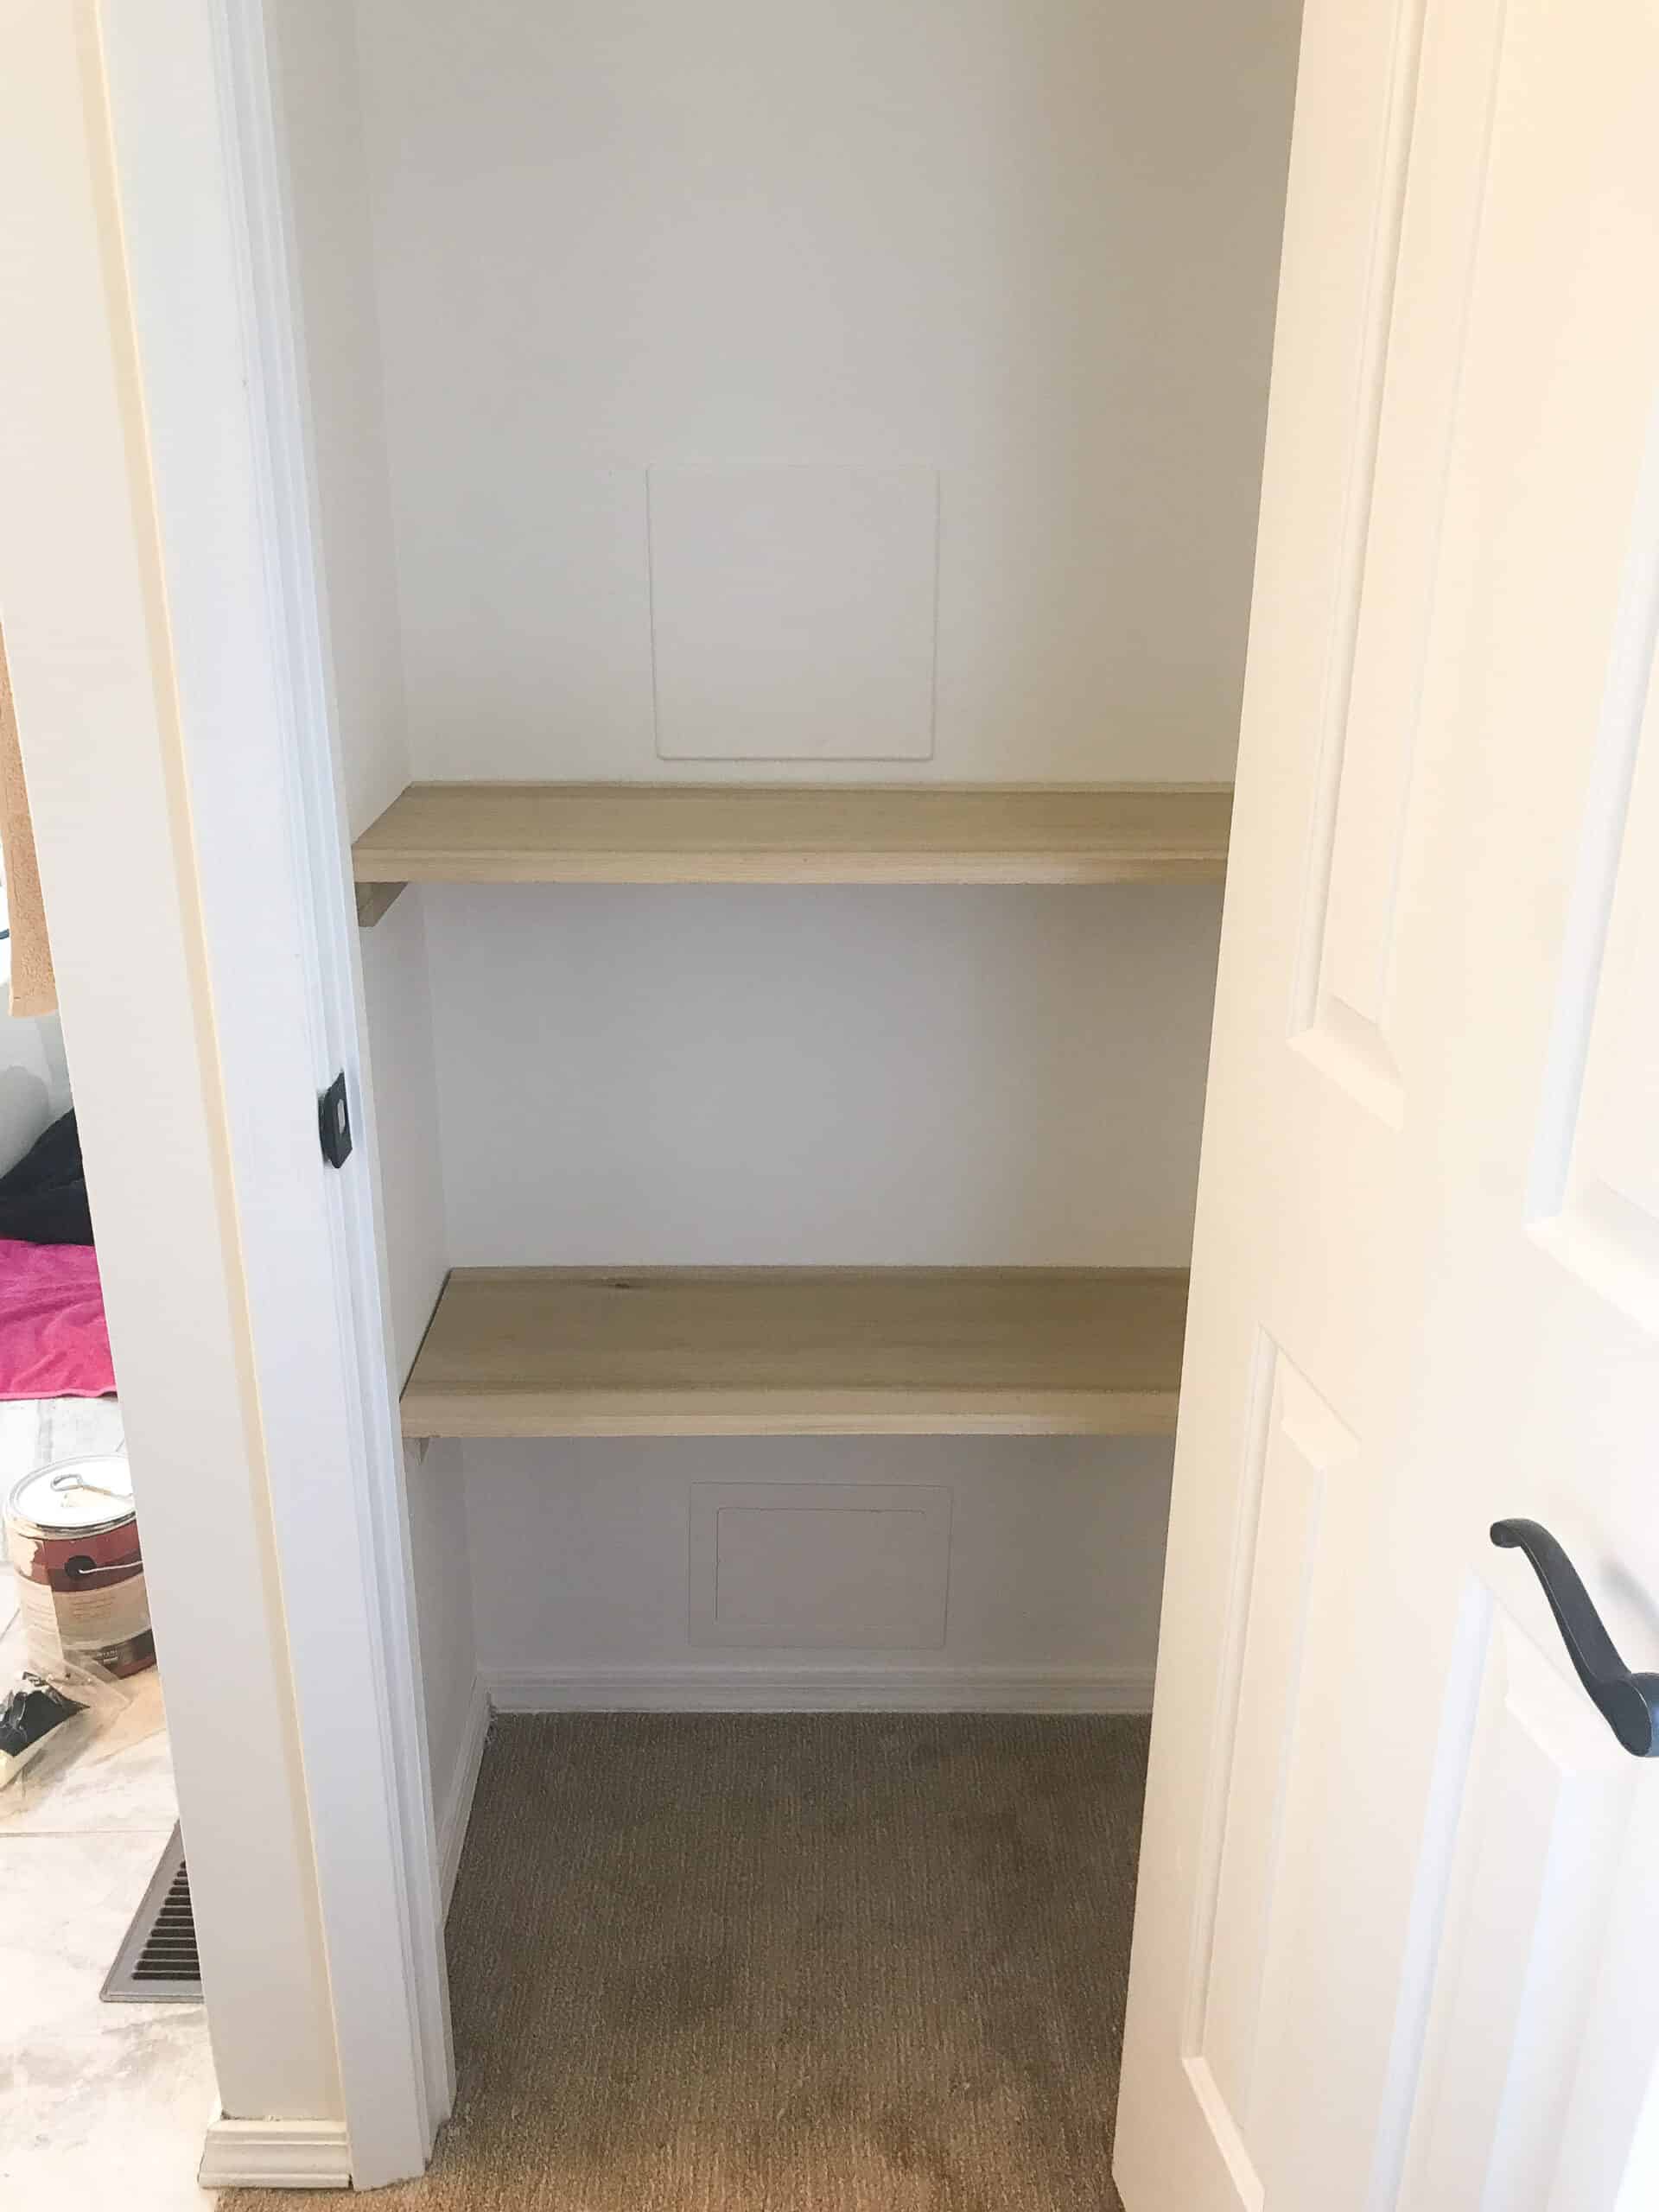
7. The last step to assembly is to nail the one×3 to the front. Take your fourth dimension and line information technology up well so you don't have a lip! This slice simply makes it look more finished. Again nosotros used a smash gun, and wood glue, simply a hammer and nails will work as well. Just be conscientious non to dent your boards.
Finishing Your DIY Closet Shelves
You will take some tiny nails to cover on your closet shelves if you used a blast gun. Utilise a TINY spot of forest filler and allow it to dry. Once it is dry out sand your boards so wipe them fully.
After you have many options – you could stain the boards and so seal them, just we personally loved the natural expect so just sealed the boards by rolling the sealer on with a foam roller.
Allow the shelve to fully dry earlier loading them up.
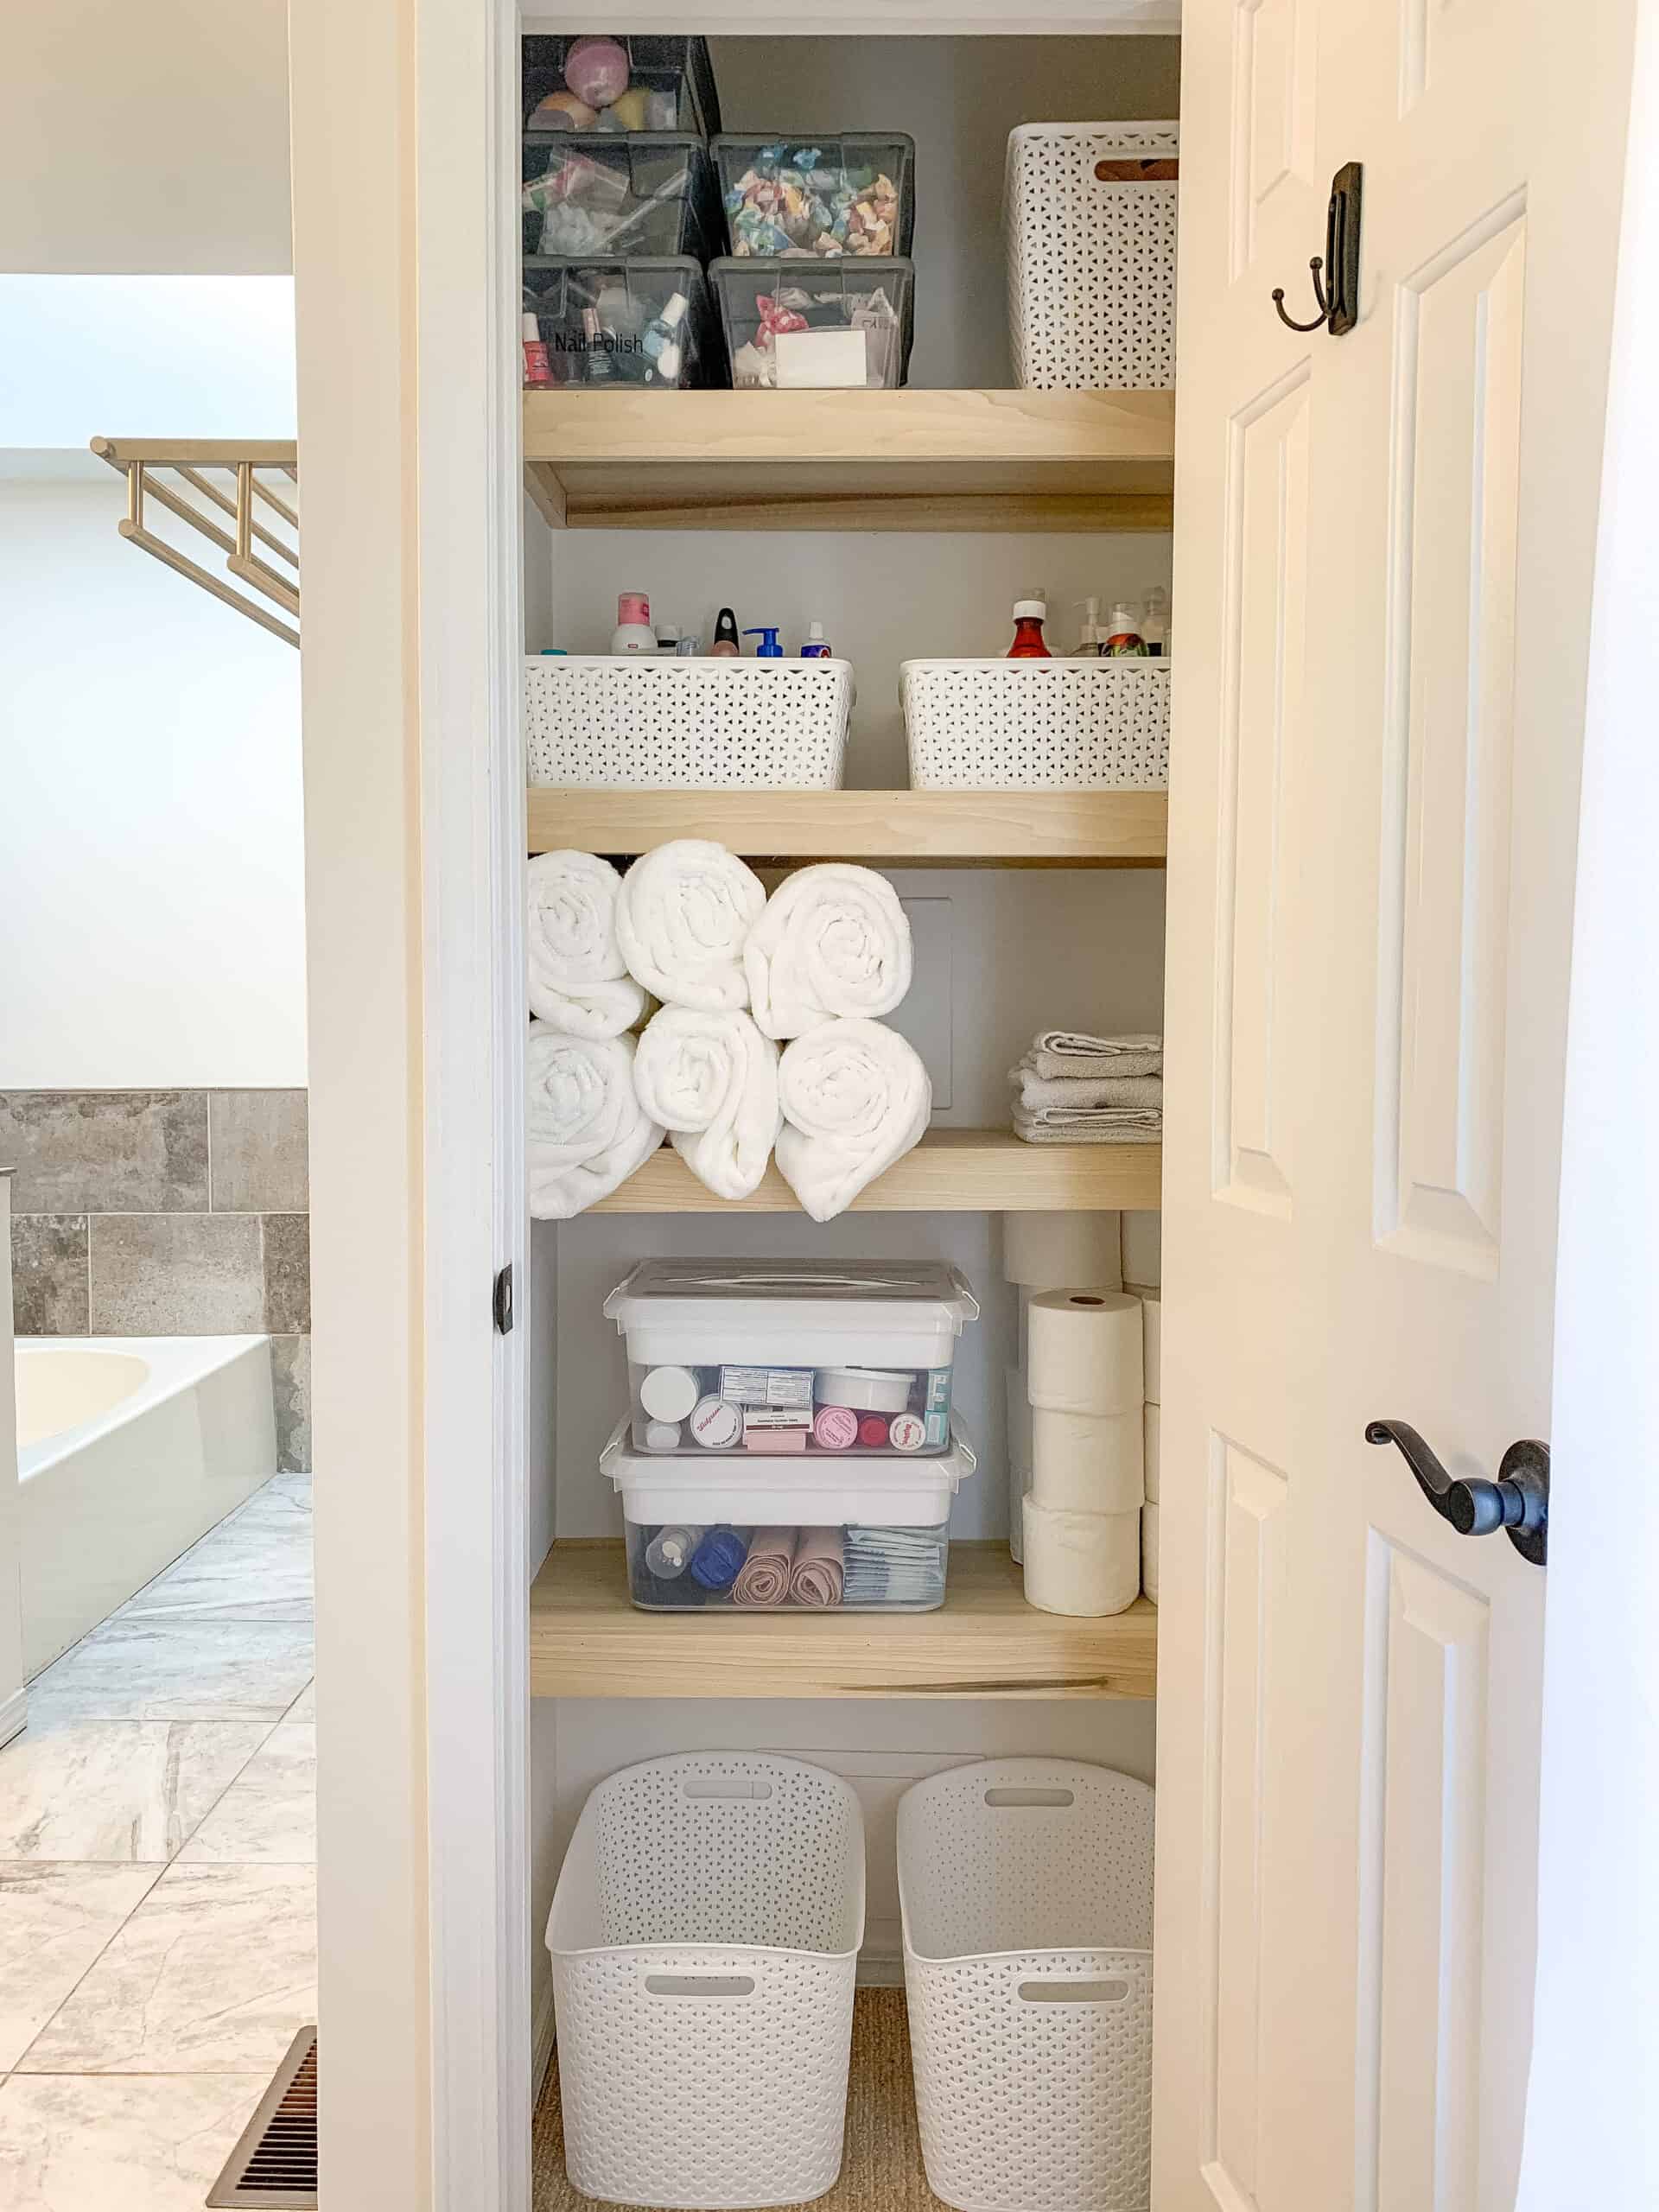
Details on my Styling and Organization
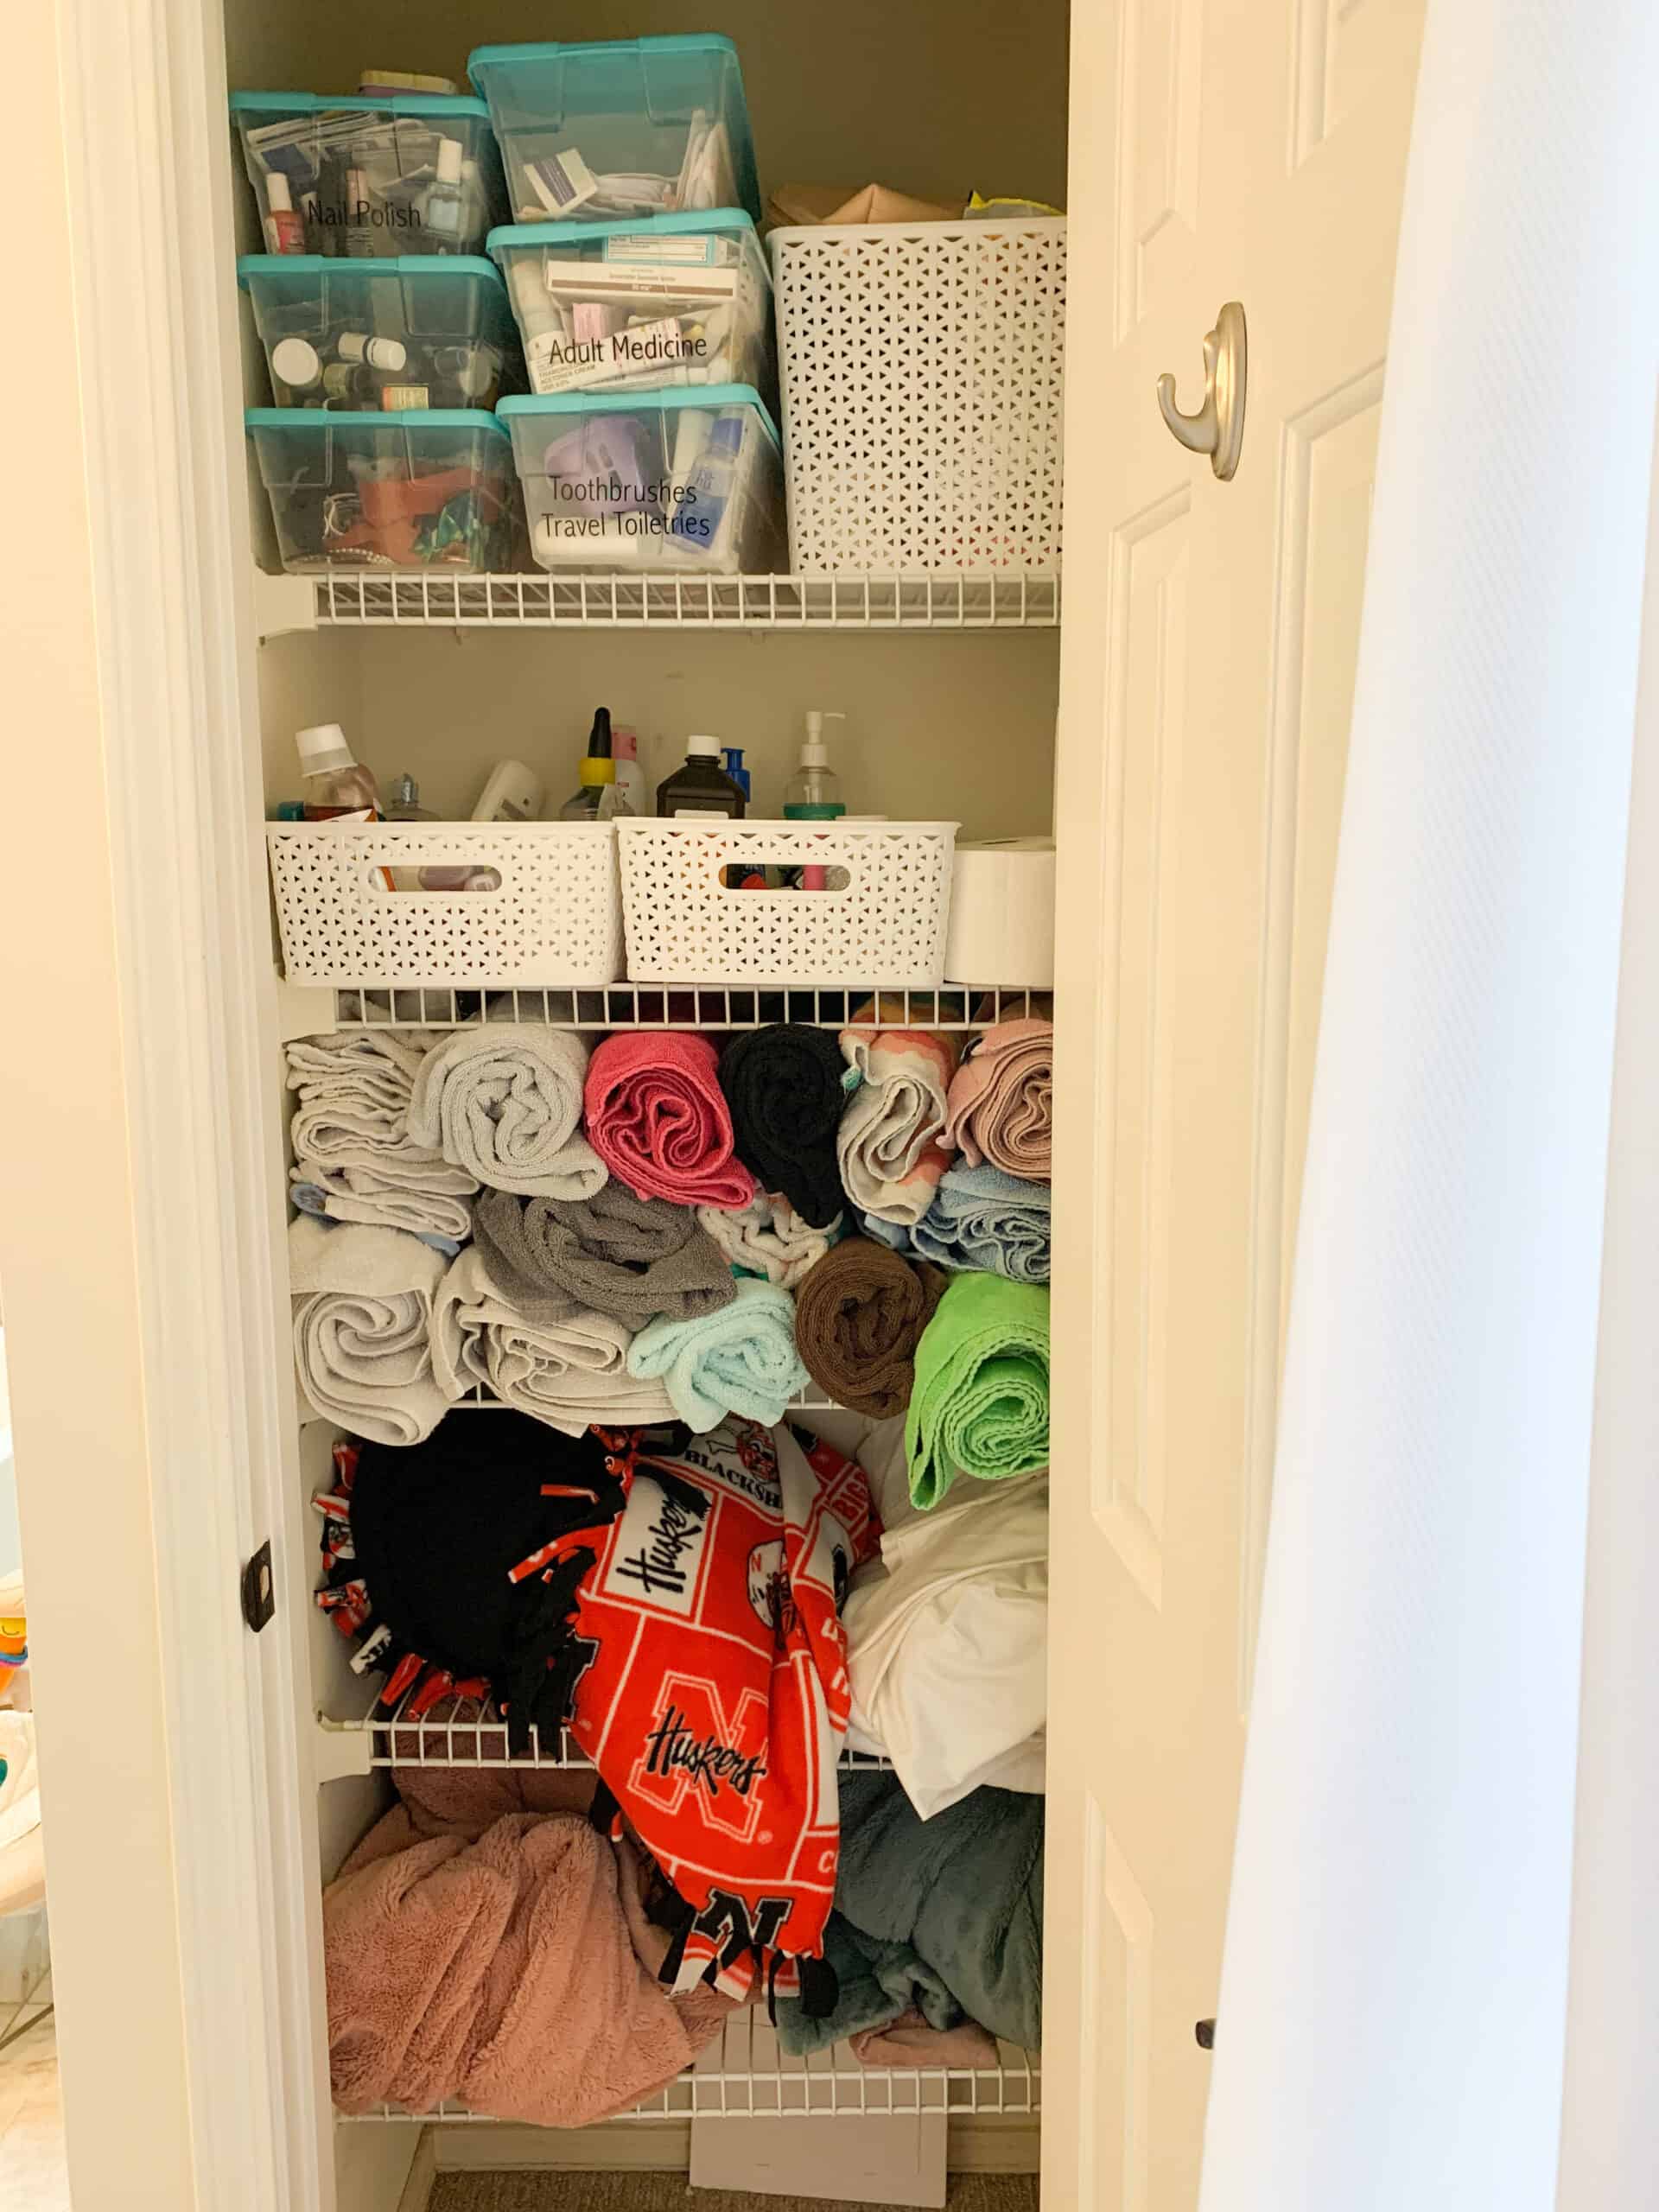
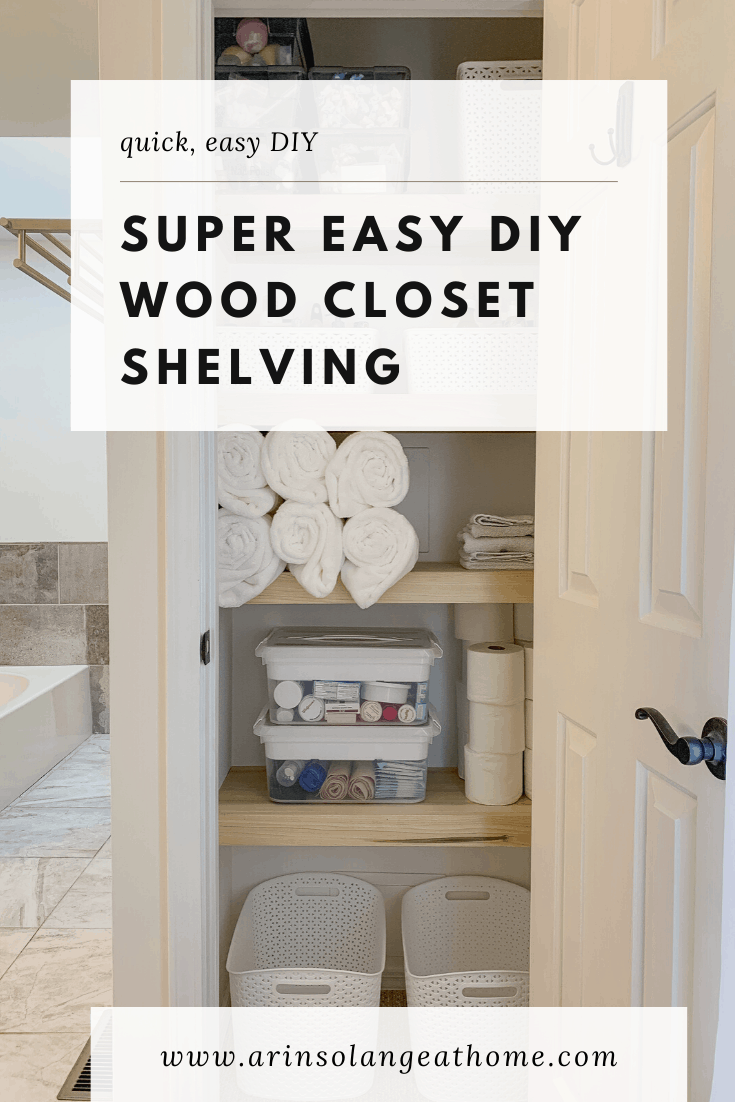
And since this was a part of our organization, I wanted to talk a bit about how I organized my closet shelves once they were in. I accept been using the white bins throughout the house recently and beloved using those for extra products. Some of them are products we use simply once in a while, or backups.
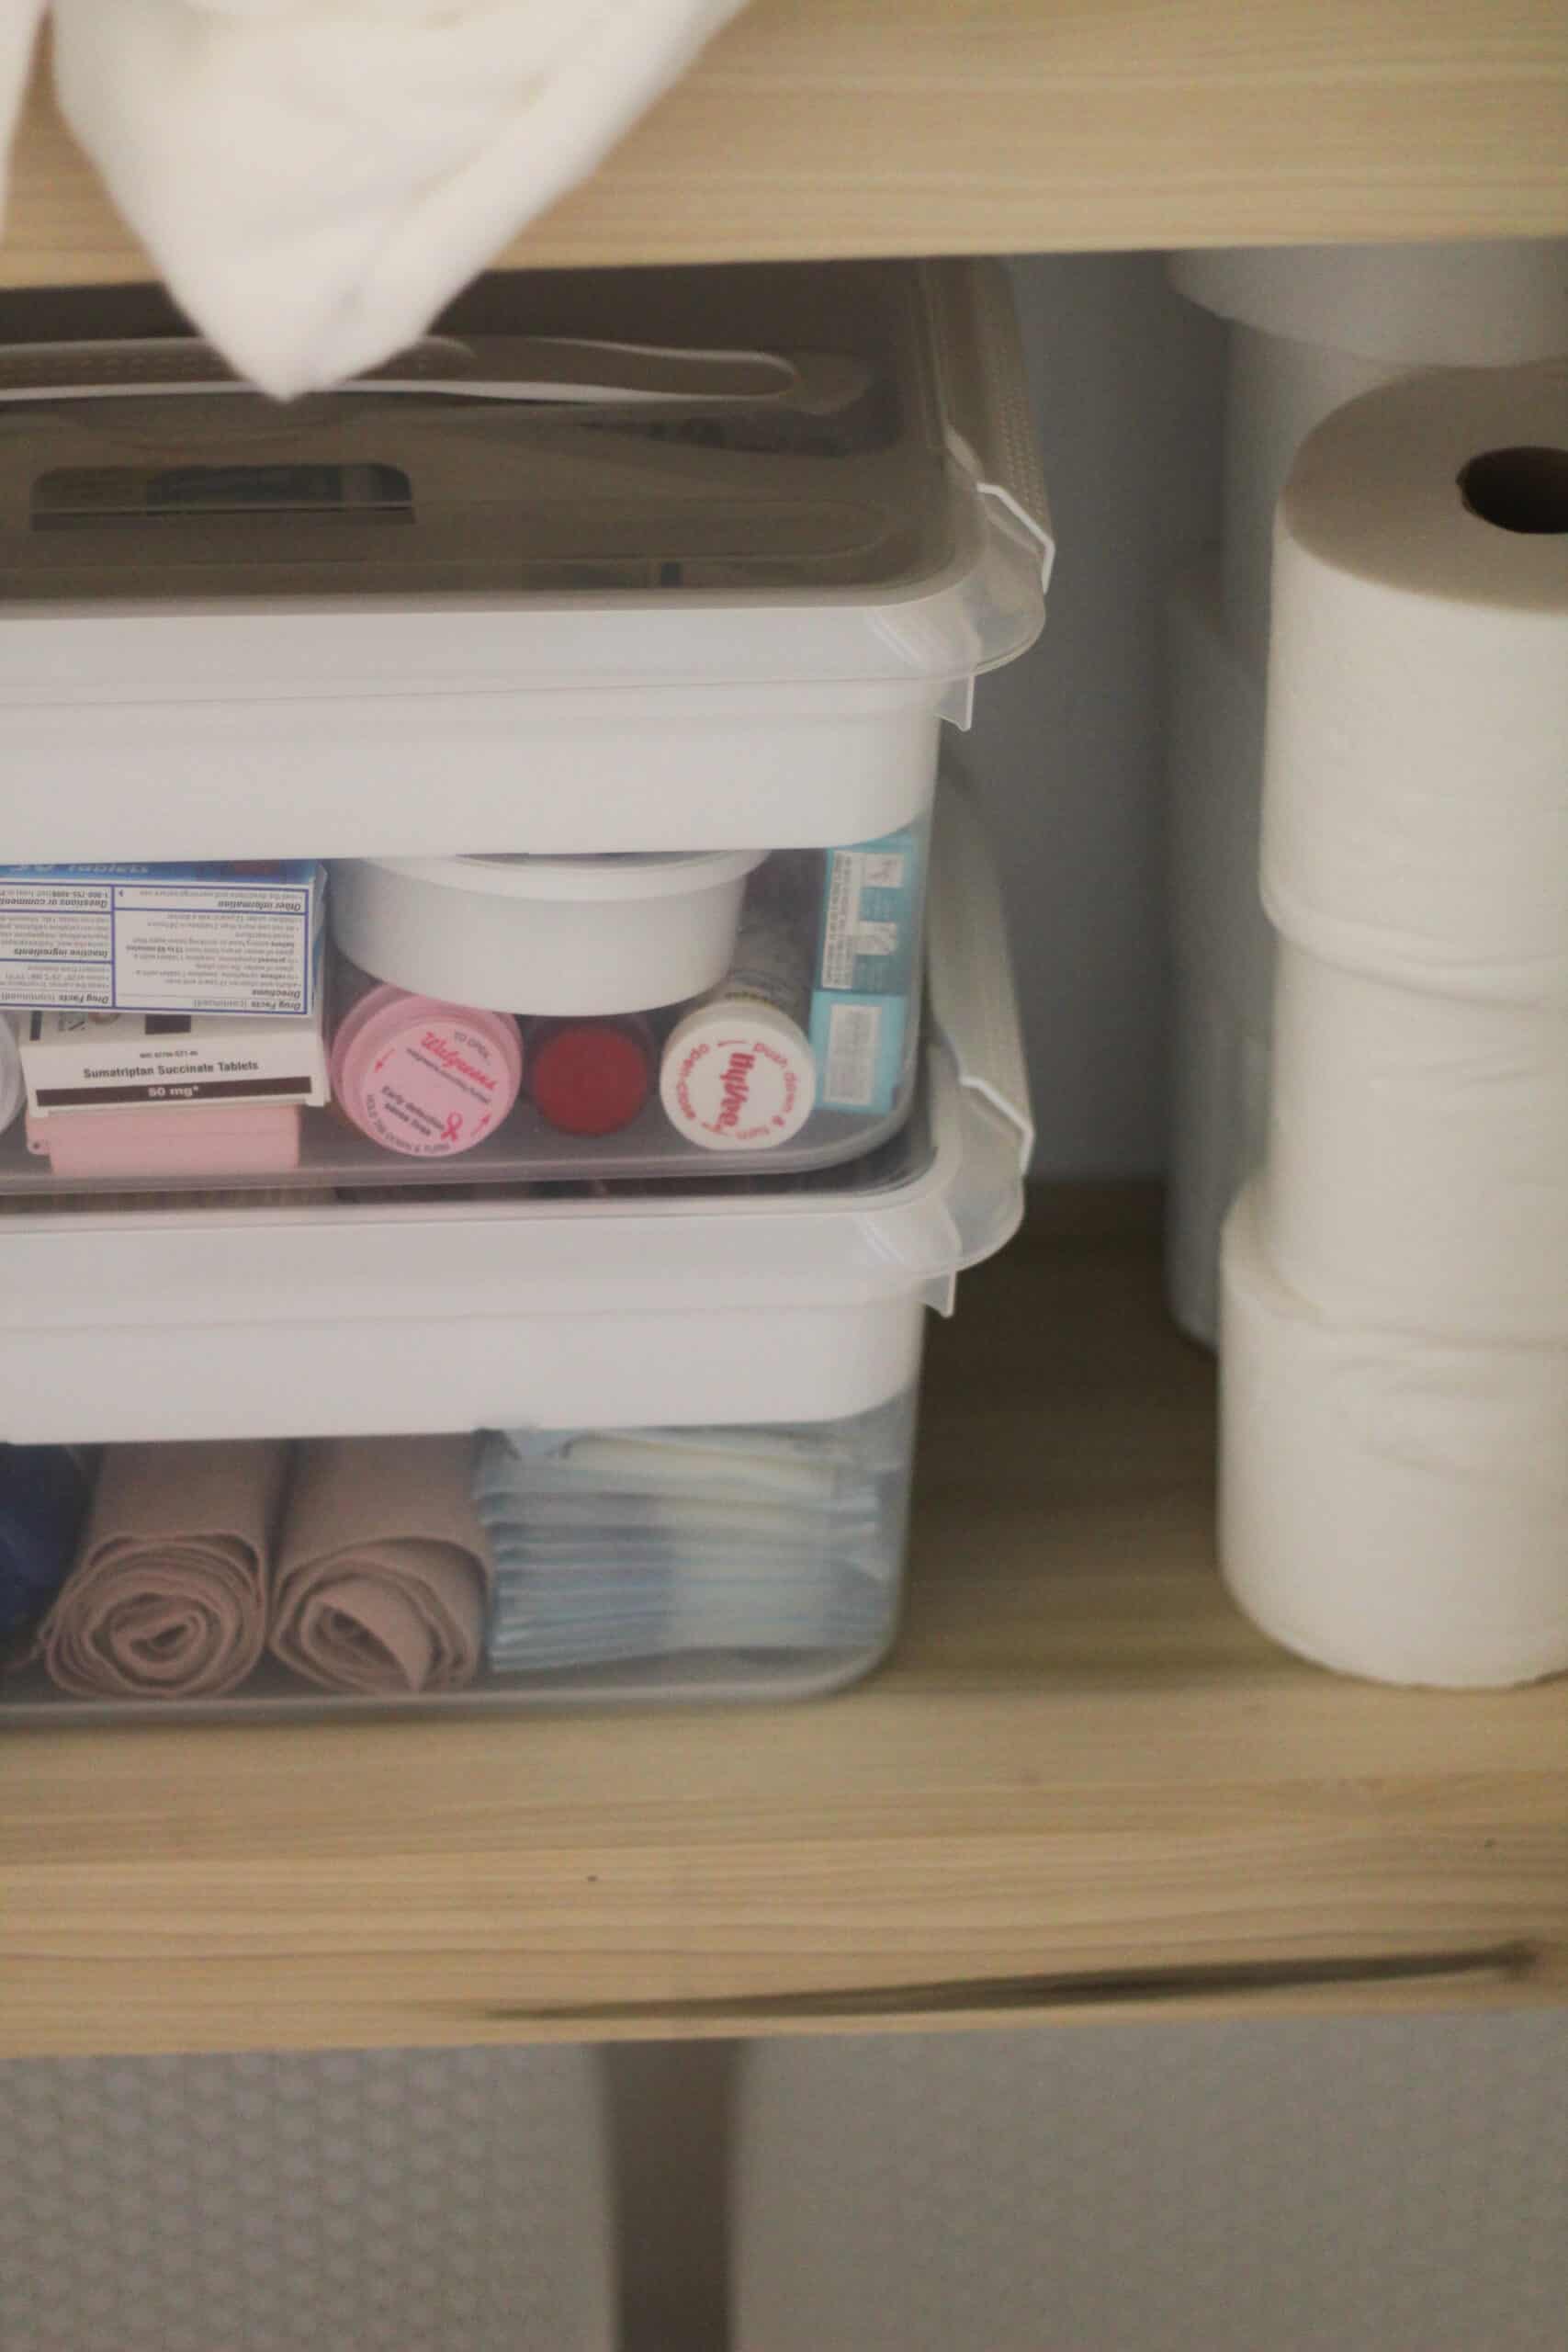
The two clear bins with white lids on the lesser shelf are a favorite. I originally wrote almost how I used those for my kids arts and crafts bins, and they went crazy in Instagram country. I concluded up using one for all our medicine and one for all get-go assistance. Information technology worked and so well to keep things together and organized!
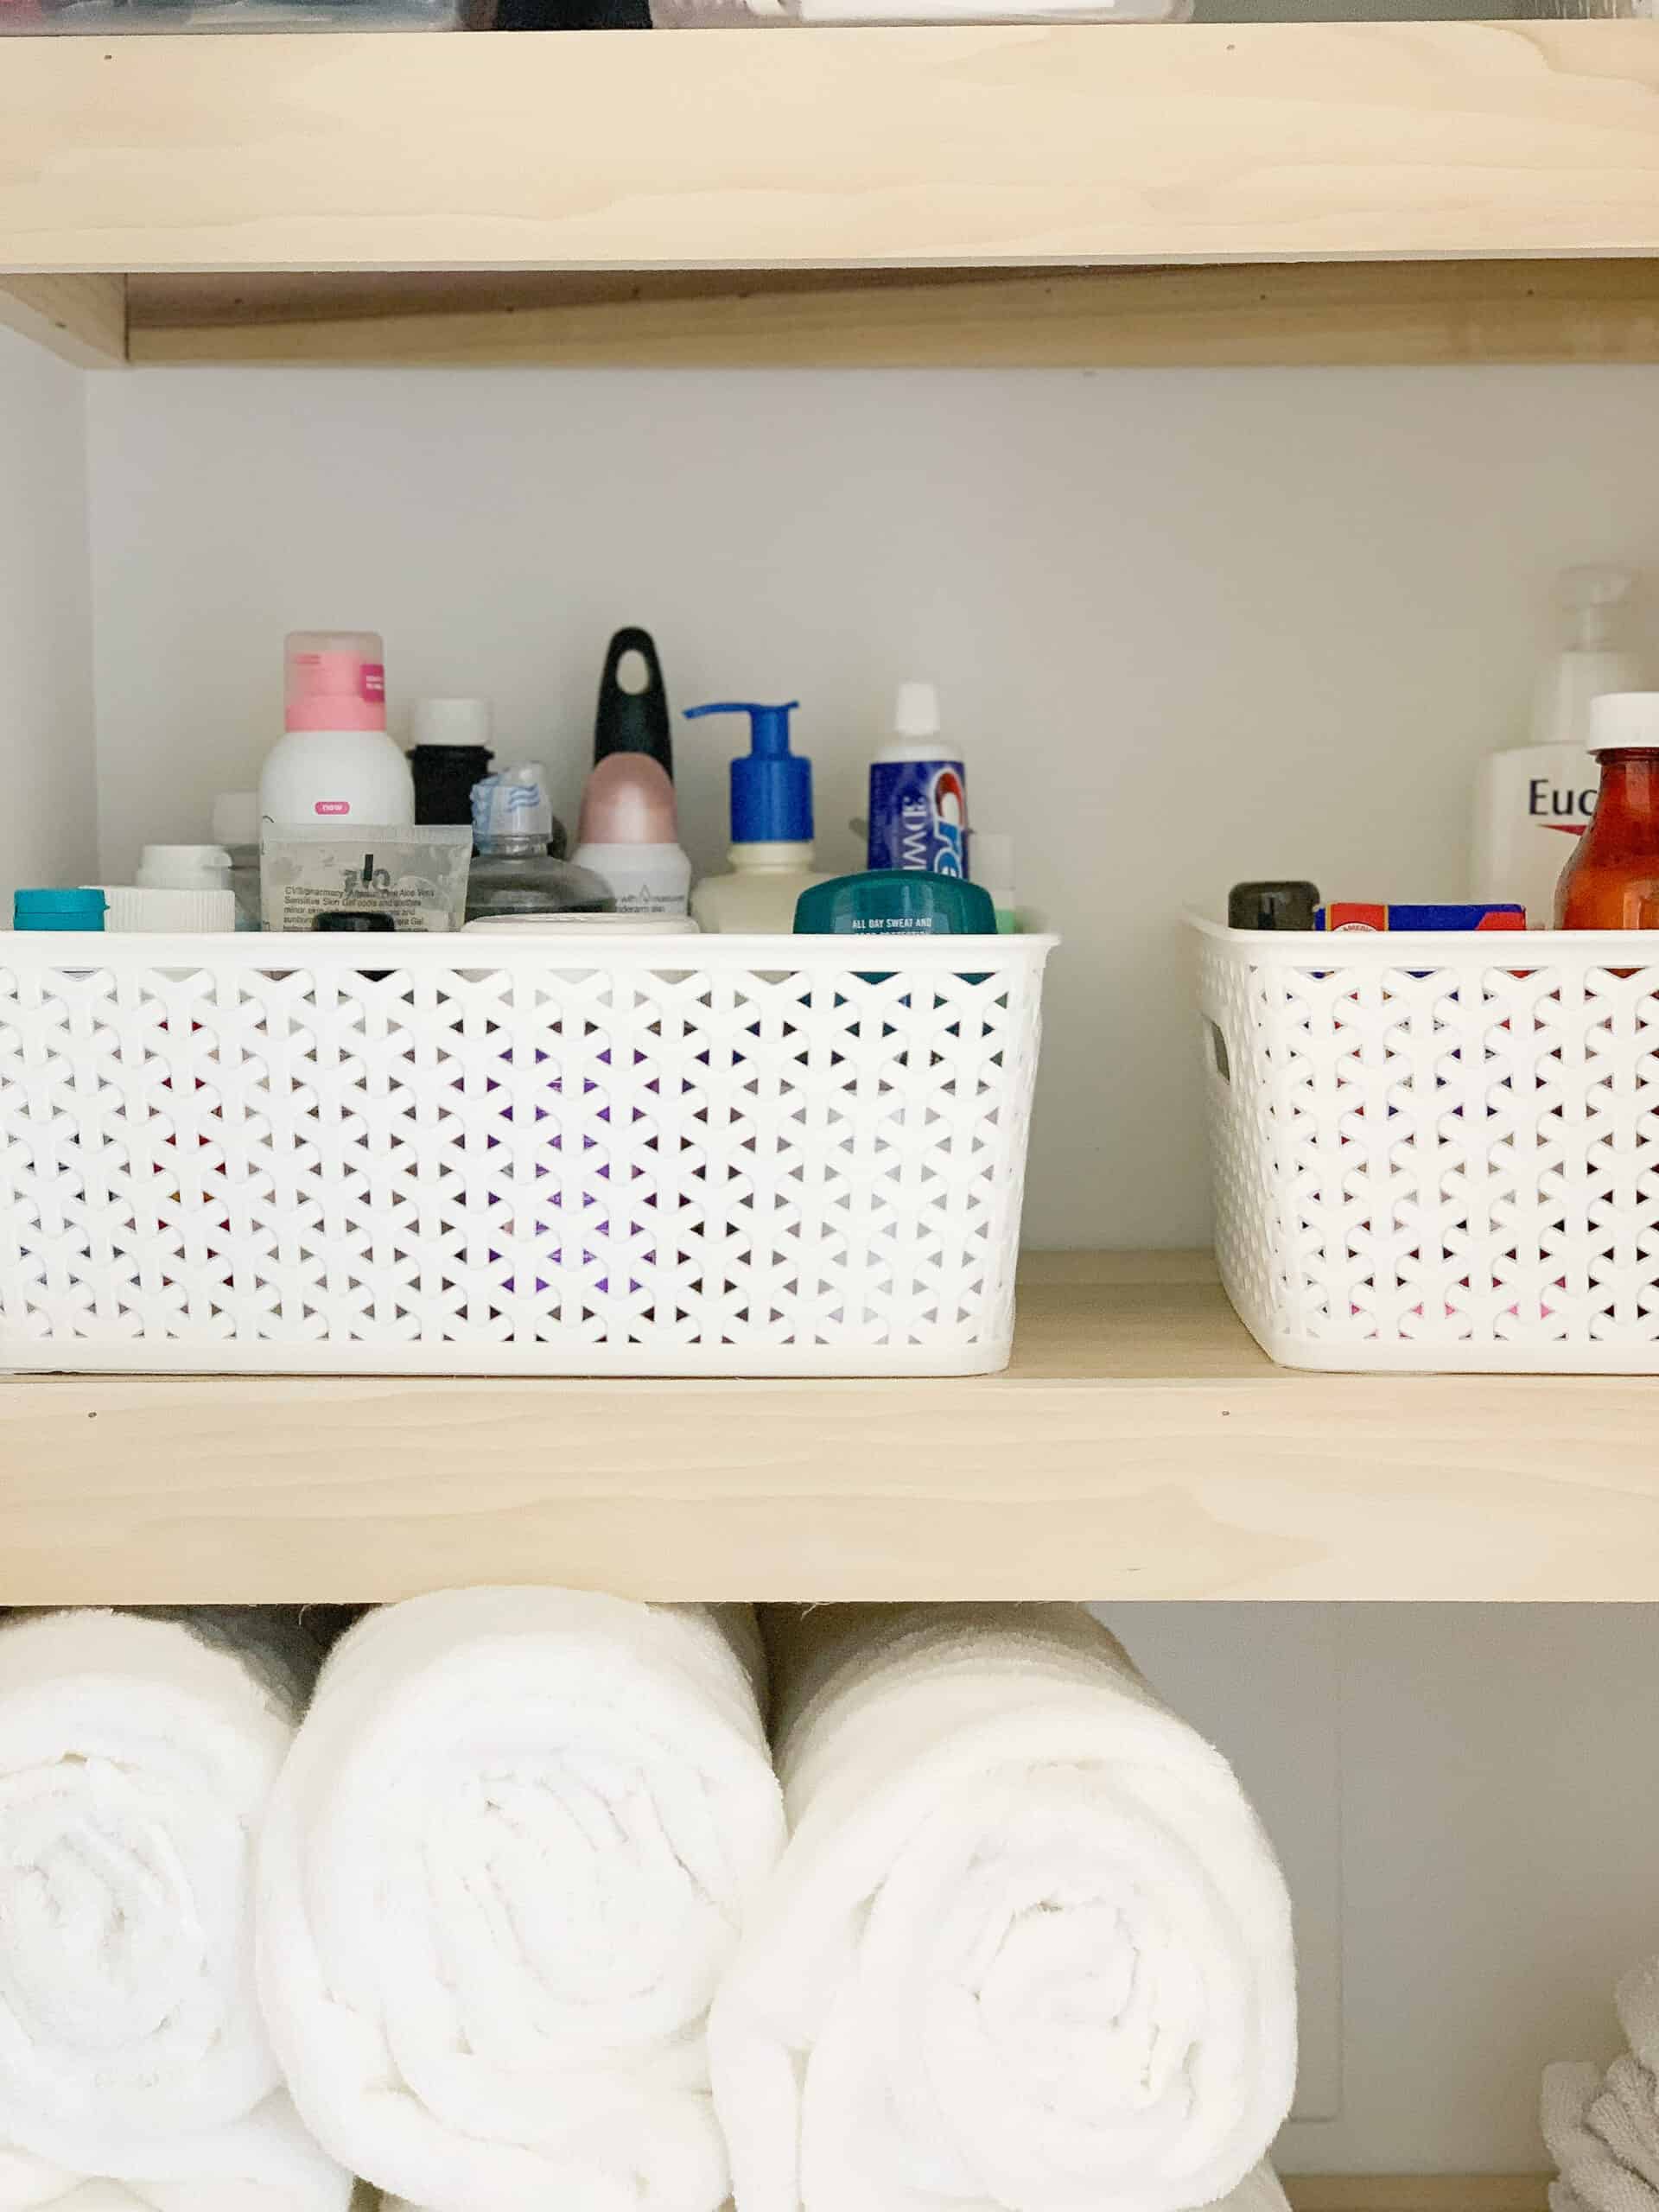
The bins on the top shut t shelves contain things like nail smooth, oils, and stuff. Things I don't use daily at all only want organized.
For towels we always roll our towels. You can fit way more than on a shelf, and its easier to keep them uniform. We donated all our old towels and are updating them, and so if they wait new and white – information technology's considering they are ha!

If you liked this postal service, check out my Kitchen Update that we did in one calendar week for $200
Hopefully this mail was helpful and you experience set to tackle DIY cupboard shelves. My husband and I are learning as we go on DIY – and I would definitely say this fits into the beginner level of projects, so if wood cupboard shelving has been on your list to endeavour, definitely give it a go! If you accept questions leave a comment below or DM on Instagram.
Pivot the Moving-picture show Below for the DIY Wood Closet Shelves tutorial afterwards

Source: https://arinsolangeathome.com/diy-wood-closet-shelves/
0 Response to "How To Remove Wood Shelving From Closet"
Post a Comment